

USB
Make your own USB Rubber Ducky using a normal USB Stick
Did you ever wanted to make your own USB Rubber Ducky?
Well now you can using a regular USB stick, i must start with mentioning that it can not be done with all the USB sticks you will need one with a specific Nand chipset on it.
More specific the Phison 2251-03 (2303)
So now you are probably wondering where do i get that specific usb stick then, and how do i know what chipset is on it?
On github there is a list with all know compatible devices, but most off them are not for sale anymore.
So what do i do then ?
Well you can buy one in my webshop 🙂
So this is what u need to get started, and you will also need the following things:
FILE ONE:
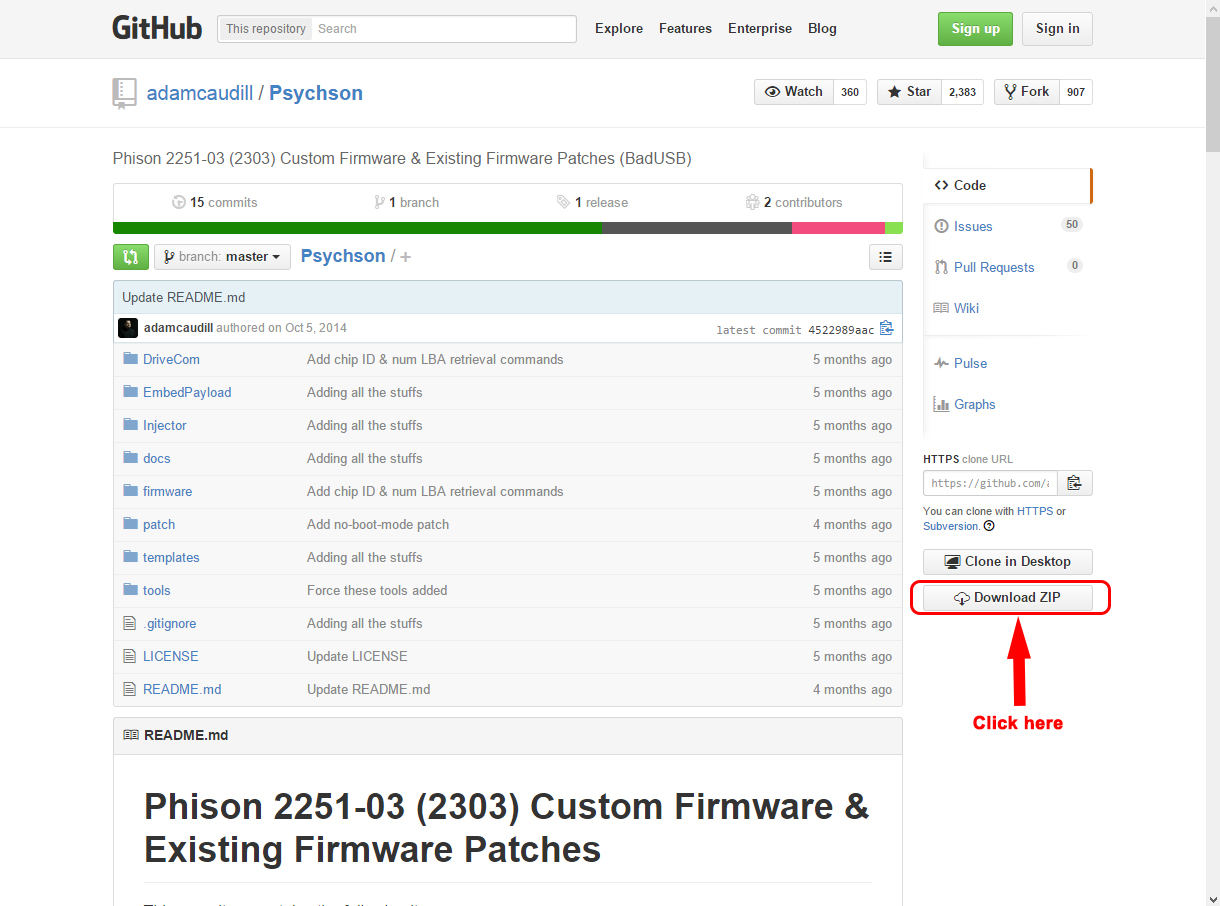
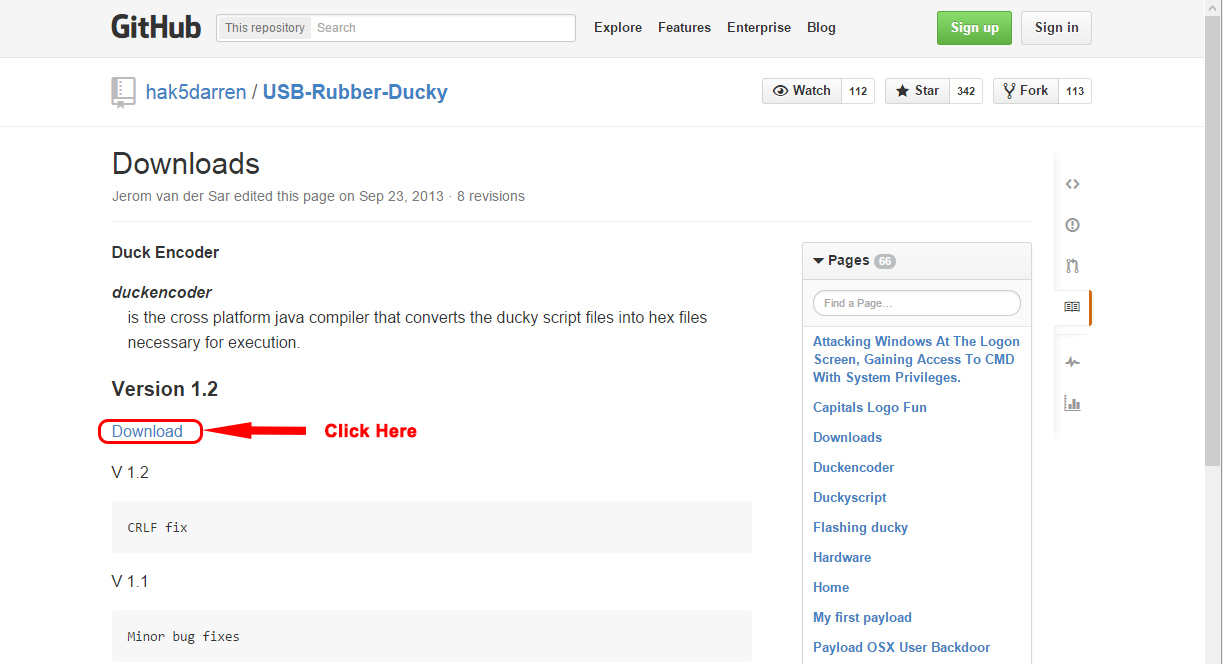
- The Zip file from github found here : LINK
FILE TWO:
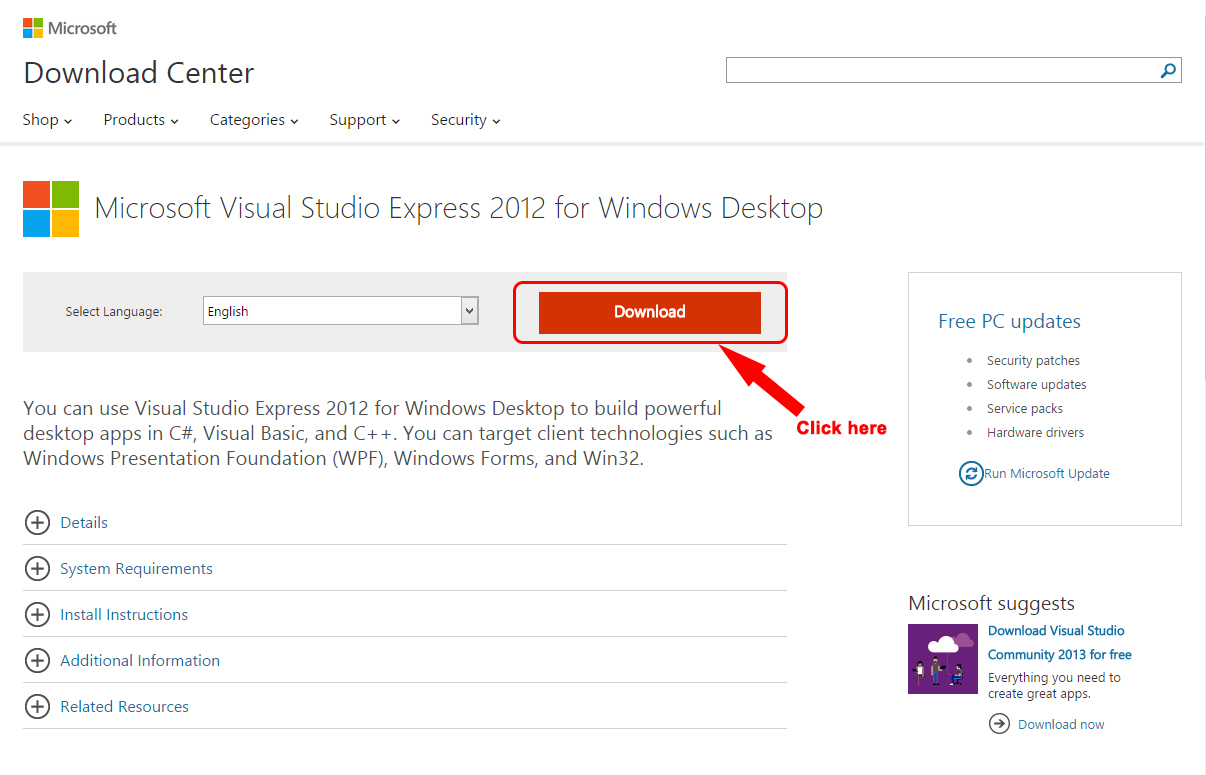
- Visual Studio 2012 Express which can be downloaded here : LINK
 File THREE:
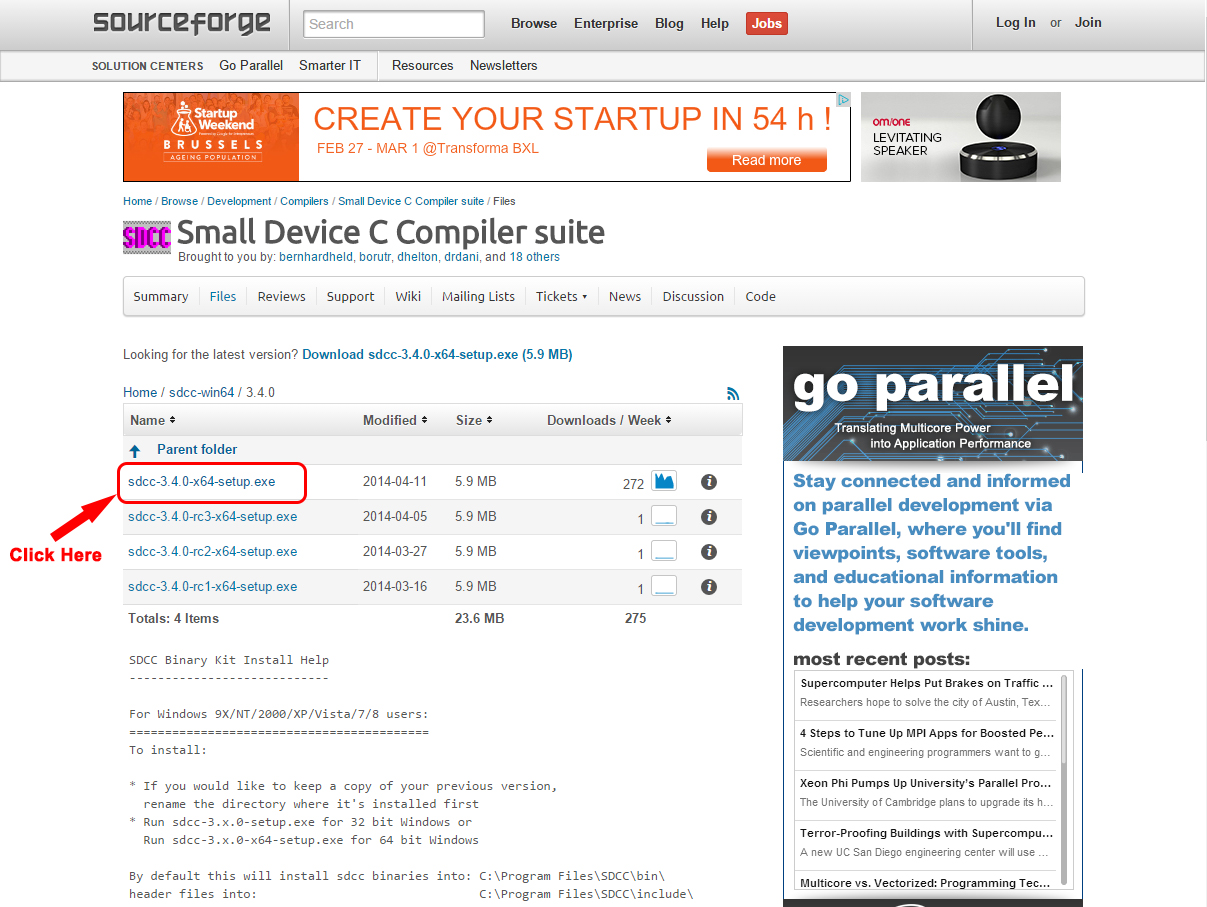
- SDCC (Small Device C Compiler) which can be downloaded here : LINK
FILE FOUR:
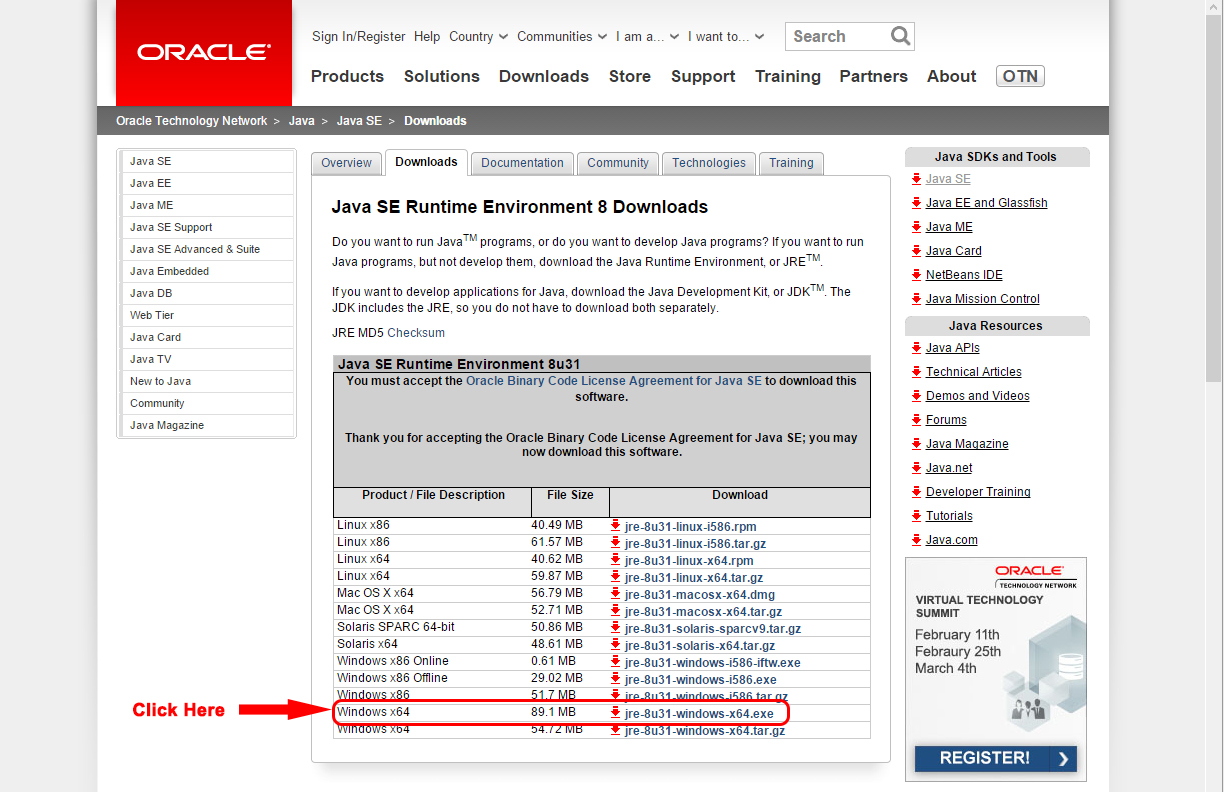
- Java Runtime Environment 7 which can be downloaded here : LINK
FILE FIVE:
- Duckencoder.jar which can be downloaded here : LINK
FILE SIX:
The Burner image and firmware for flashing the USB stick
Which can be download here : LINK
==============================================
Now that u downloaded all these files u are ready to install them!
Follow along with me for how to install all this properly
So we only need to install 3 things (cause other are just zip packages you will need).
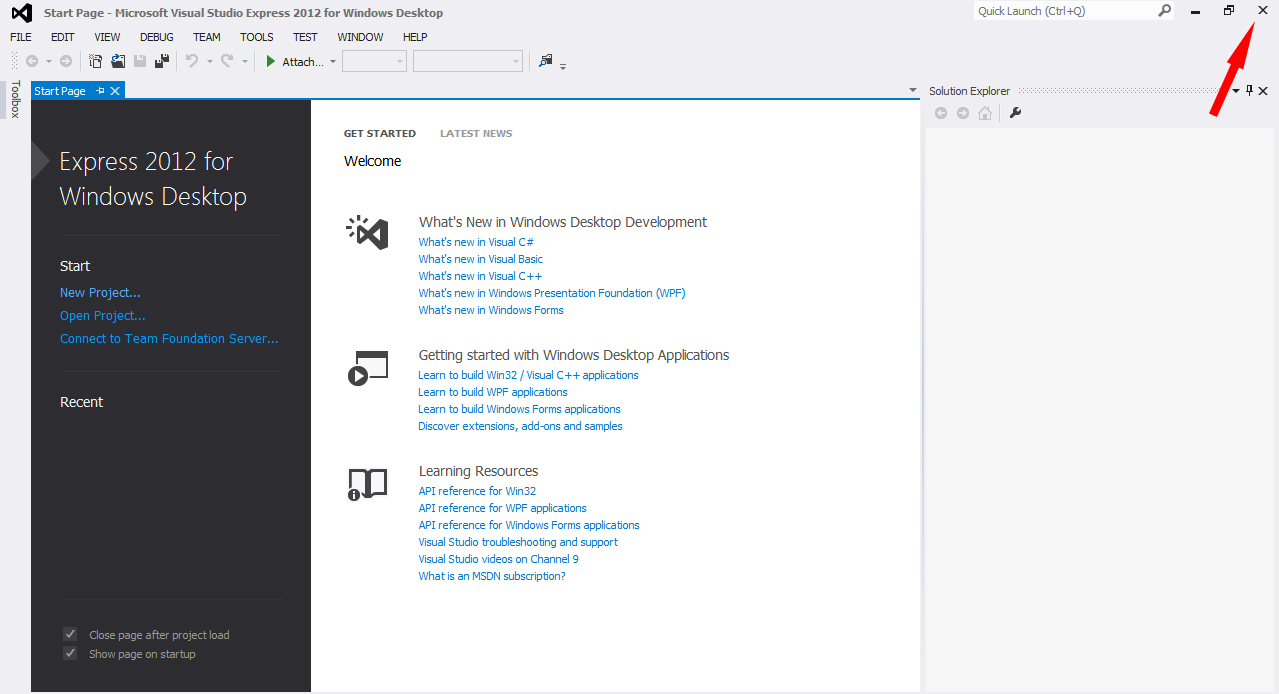
Let’s begin with Microsoft Visual Studio Express 2012
Step One :
Go to the location where u downloaded the Visual Studio Express 2012 setup
Mine is in Downloads
so double click this icon where u saved it
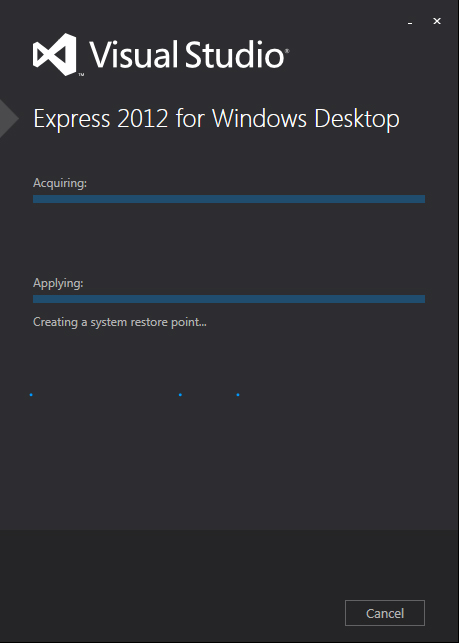
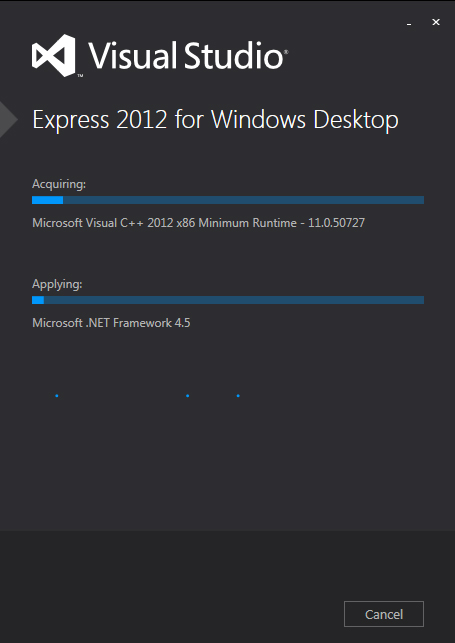
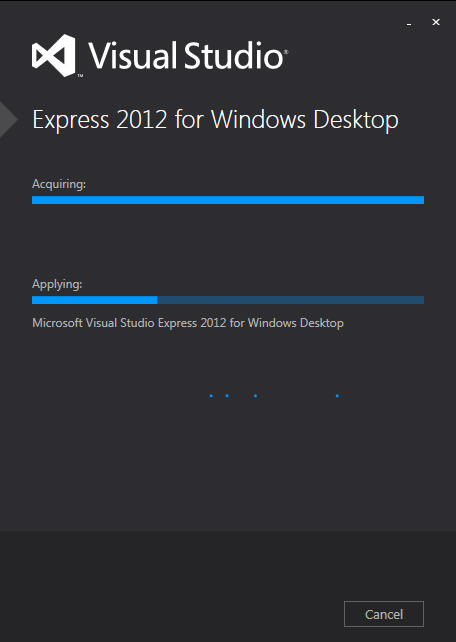
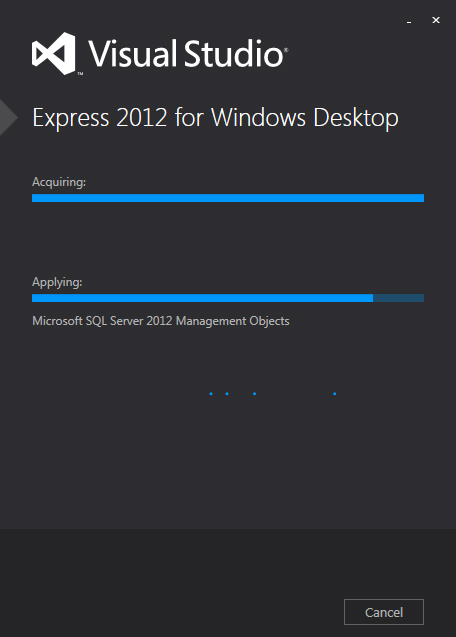
 now follow along with the procedure shown below.
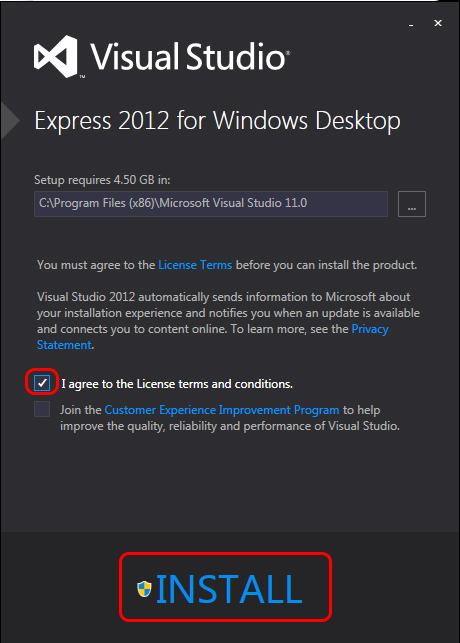
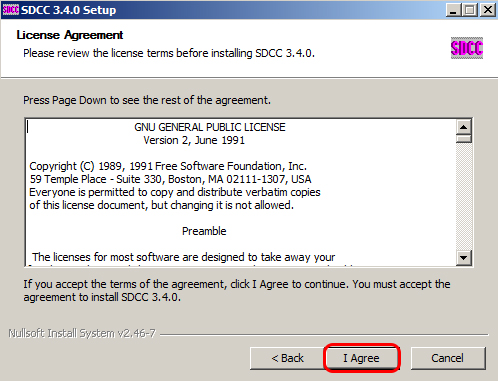
Now make sure u check the box I agree to the License terms and conditions
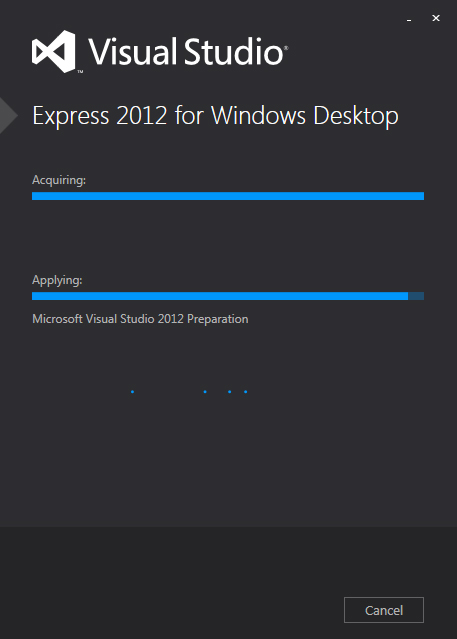
and click INSTALL
u should then see the following things pass by
and when it’s done u should see this
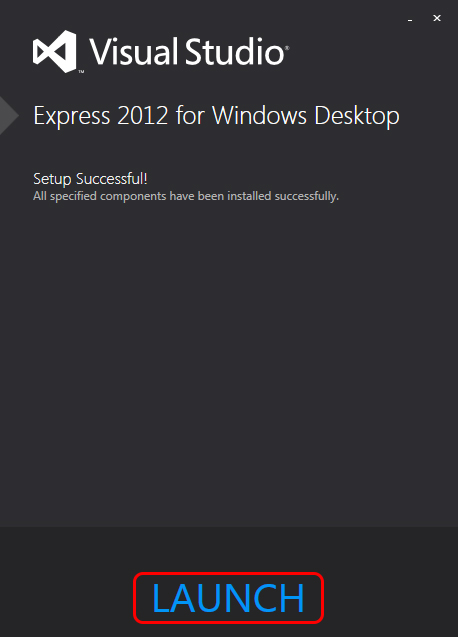 u now need to press the LAUNCH button to start Visual Studio Express
From the moment u pressed LAUNCH u should see this
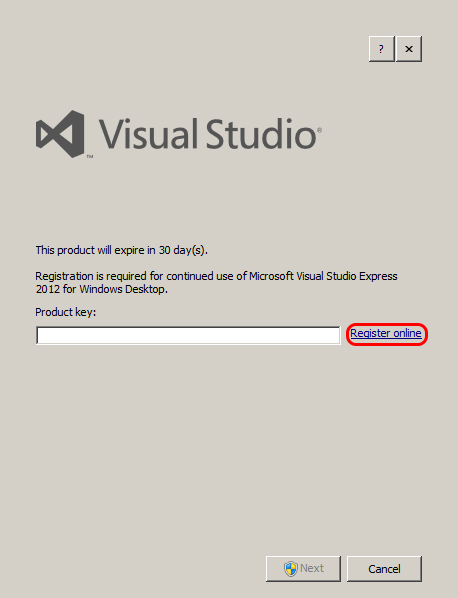 Click on the Register Online (Dont worry u will not need to pay anything cause this is a free version, but you must sign in using a existing e-mail address u have at Microsoft)
like shown here
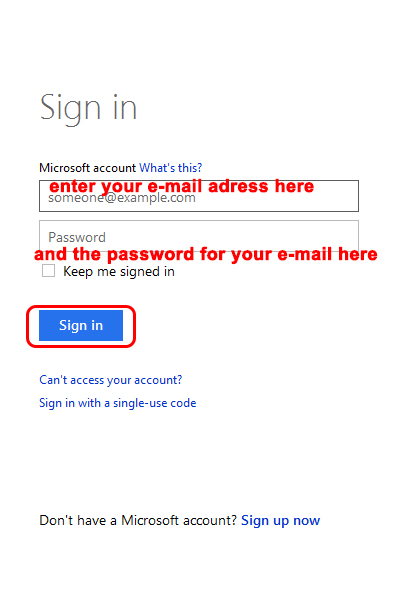
So fill in the email address and password you have at Microsoft (aka hotmail.com, outlook.com,..etc)
and click Sign In
next u should see this
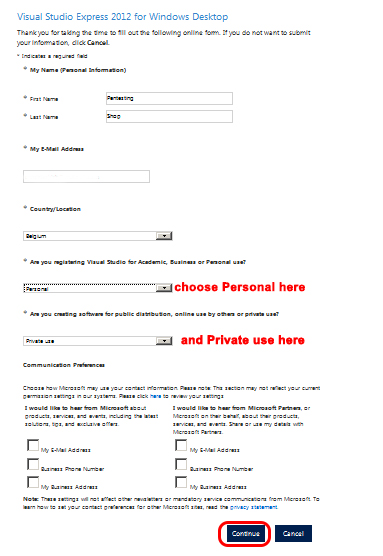
now when u see this the email address you signed in with should be automatically be filled in, i blanked out mine(for spam reason) but in the Dropdown menu where it’s asking Are you registering Visual Studio for Academic, Business or Personal use? u should choose Personal
And where it’s asking Are you creating software for public distribution, online use by others or private use? u should choose Private Use
Once u did all this Click on Continue
U should now get this
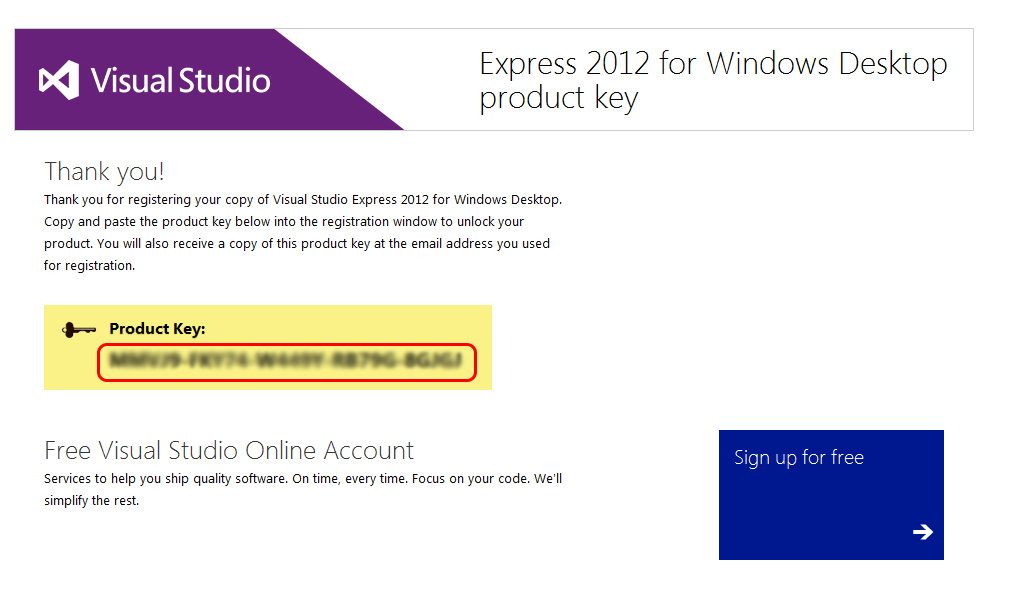
Your Product Key for activating the Visual Studio Express 2012
So copy the Product Key and go back to the pop-up u started with
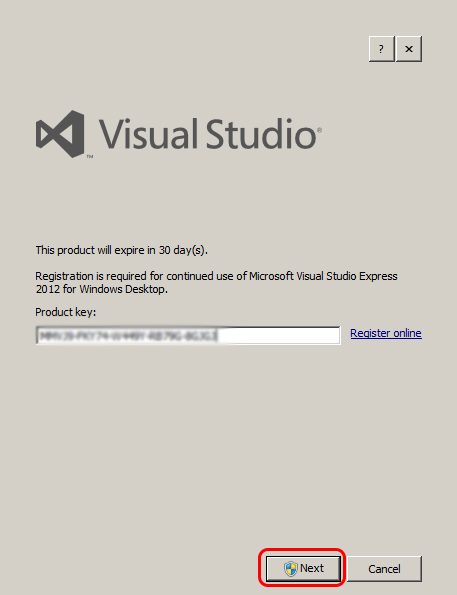
And paste the Product Key in the field and Click Next
when u did this and everything is fine u should get this
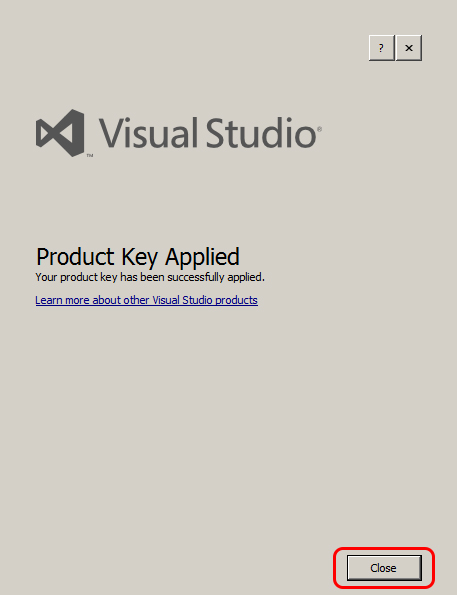
so click Close
and next u will end up in Visual Studio Express 2012
since we don’t need it right away u can close the program for now.
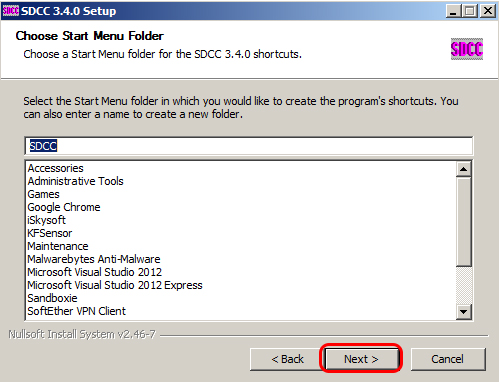
Step Two :
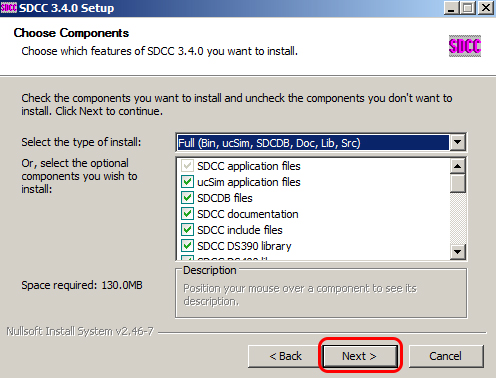
Next we are going to install SDCC (Small Device C Compiler)
so double click this icon where u download it to mine is again also under Downloads
now follow along with the pictures below
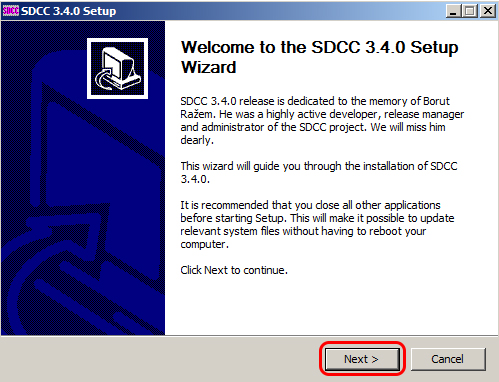
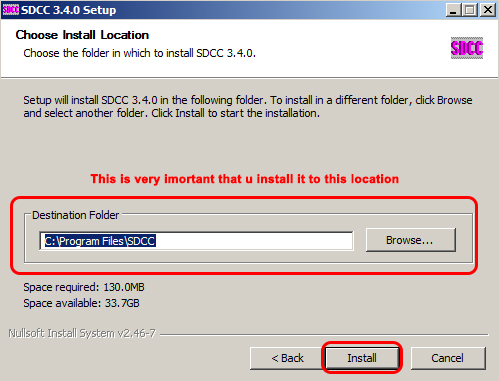
Now the next step is Very Important!
U should make sure u are installing it to C:\Program Files\SDCC
after u clicked Install u should see it installing like shown here below
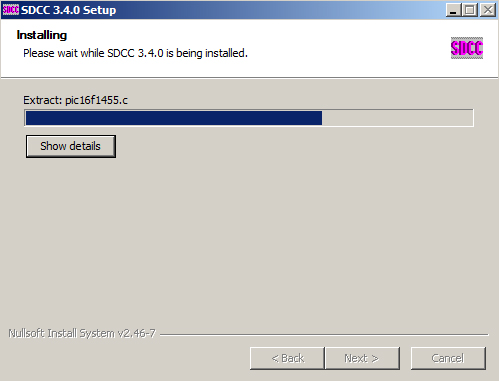
And followed by this
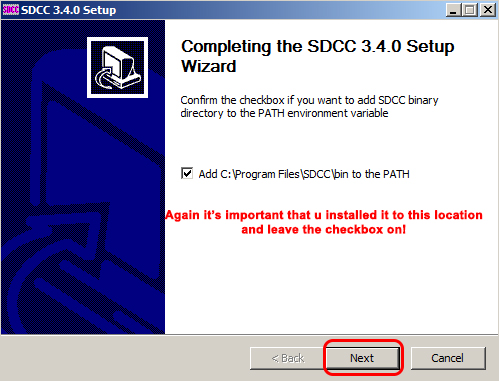
So now click Next
And click Finish
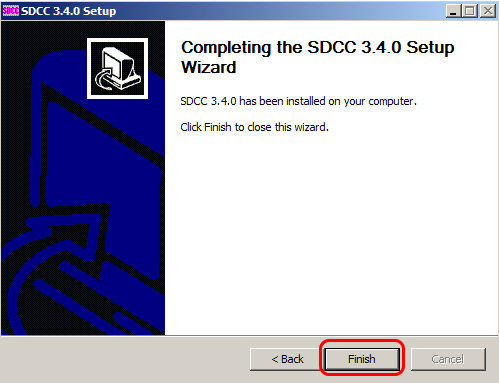
U are now done with installing SDCC (Small Device C Compiler)
Step Three :
We are now going to install Java Runtime Environment 8
well be needing this to run Duckencoder.jar
Now again go to the location where u saved the installer and double click this icon
and follow along with the pictures below
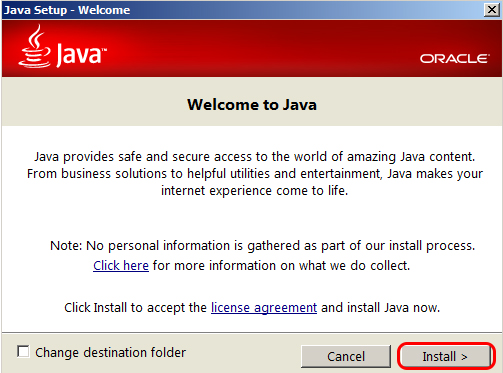
when u see this click Install

and yes it’s true 3 Billion Devices Run Java maybe even your microwave 🙂
when the setup process is complete u should get this
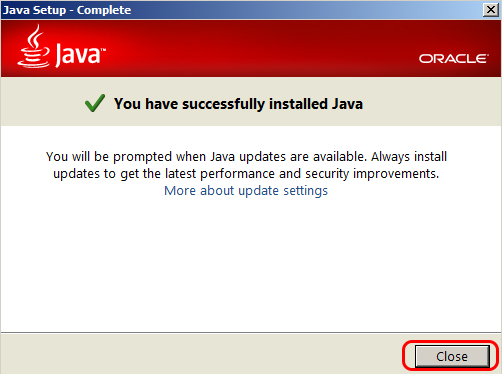
So now that it’s done click Close
Setting things up:
Unpacking the Psychson-master.zip u downloaded from github (so FILE ONE)
So browse to the location where u downloaded it to, mine again is in Downloads
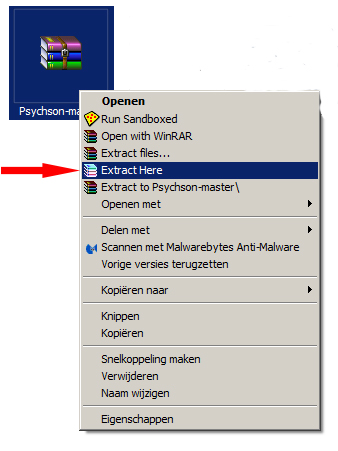
And now where u see this icon right click on it and select Extract Here like shown here below
Now that u did this u should get the Folder Psychson-master in the location where u started from so in my case C:\Users\Pentestlab\Downloads>
Now that u have this folder we should copy it to another location.
I highly suggest you do exactly the same as i do so that afterwards u can download my help file with the commands in it.
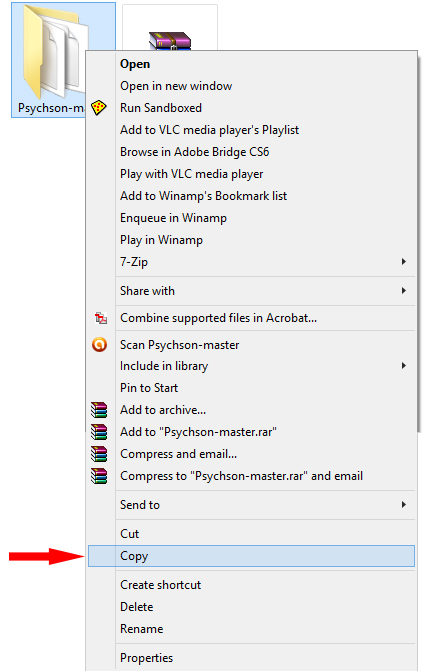
So now right click on the folder Psychson-master and select copy like shown here
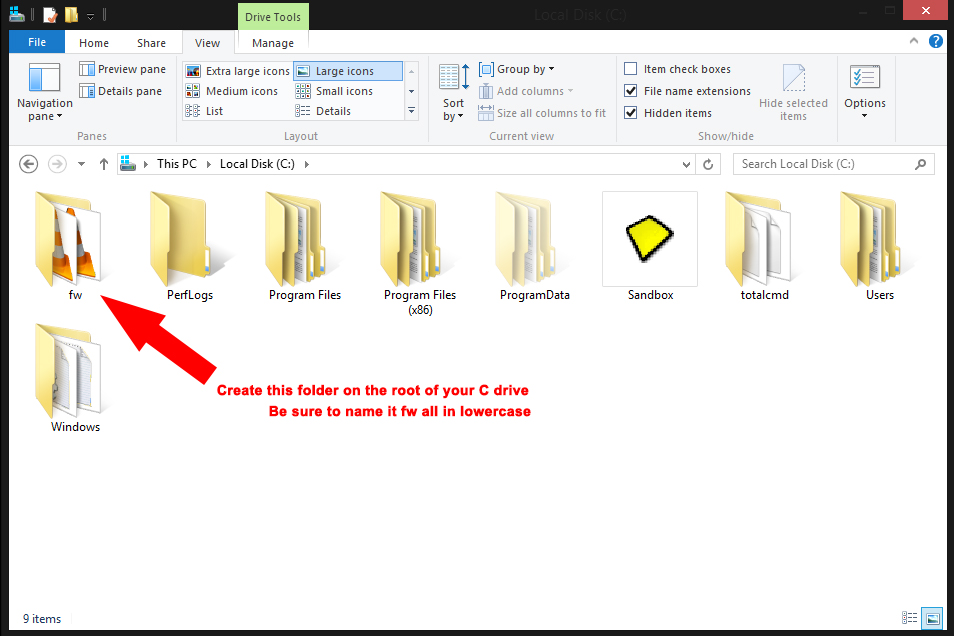
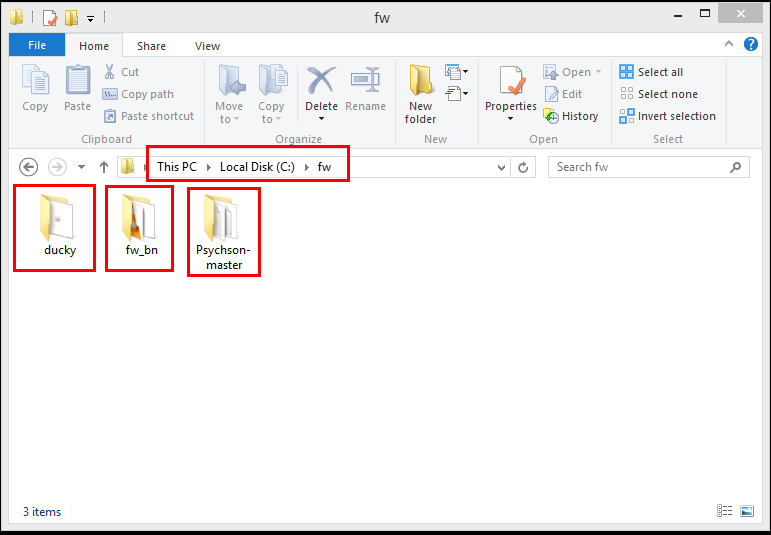
Now that u copied the file Open My Computer and go to your C:\
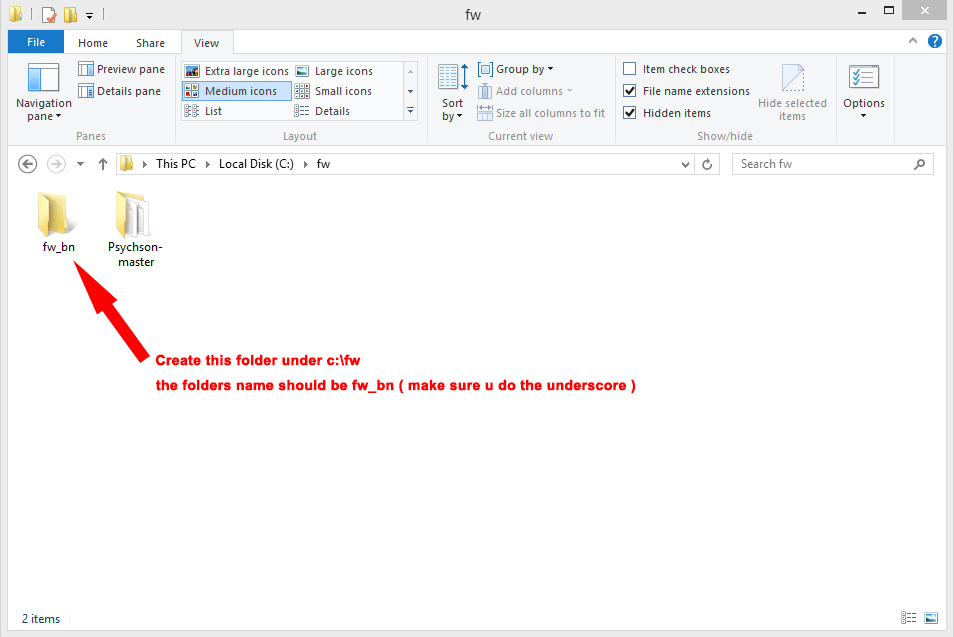
And create a new folder called fw (all in lowercase)
like shown below:
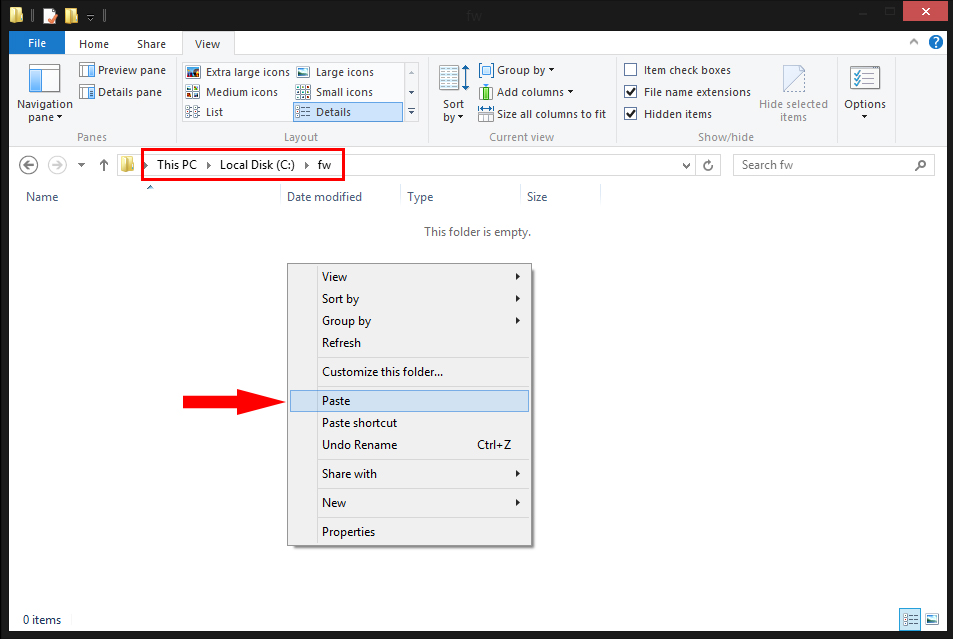
Now open that folder fw that u just created and paste the Psychson-master folder inside!
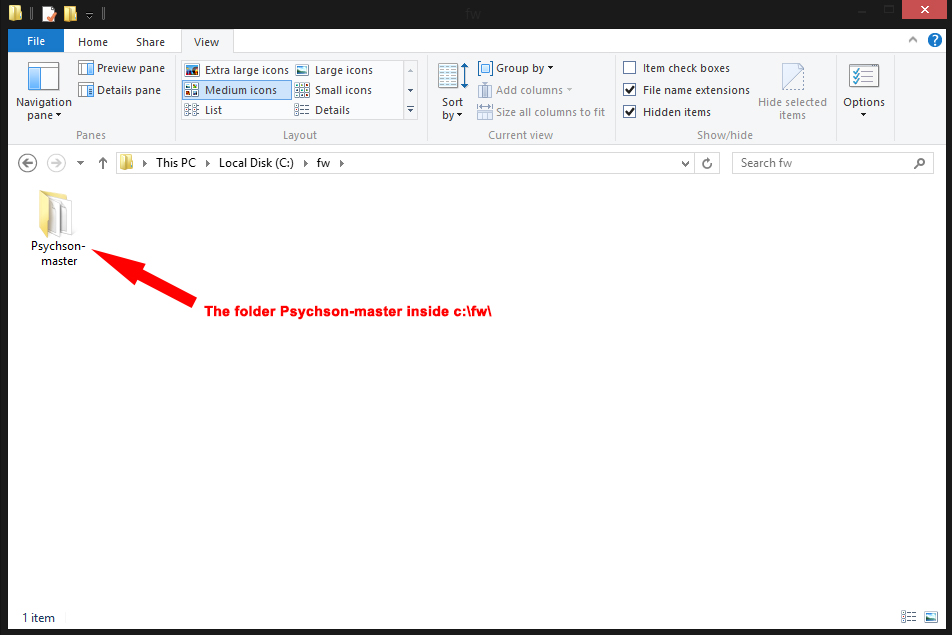
u should then have the folder Psychson-master inside the folder c:\fw\
like shown here
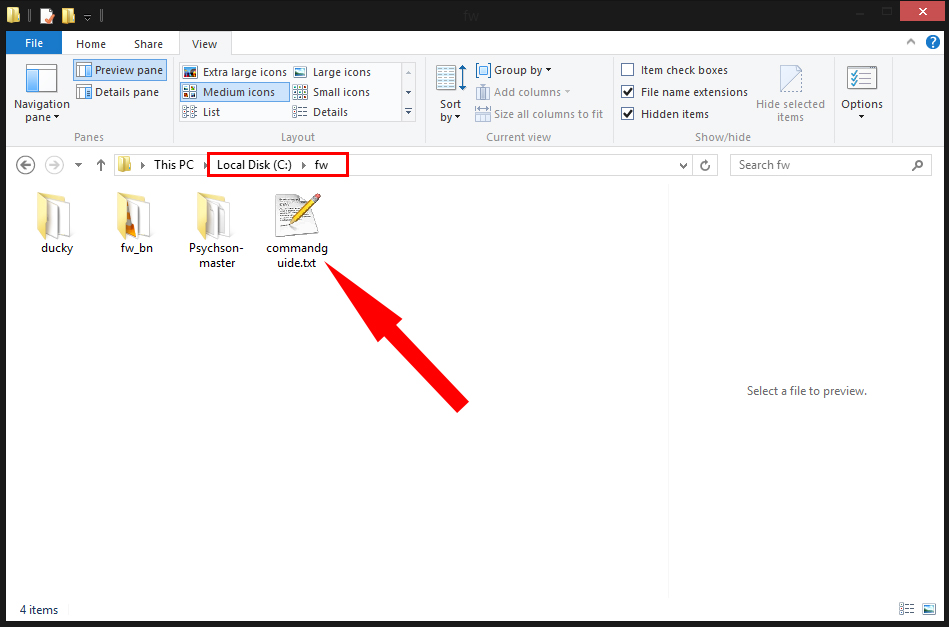
So now that u pasted the folder Psychson-master here where going to place all the other files we need here under c:\fw
since you are now in the folder c:\fw right click here and create a new folder called fw_bn
like shown here
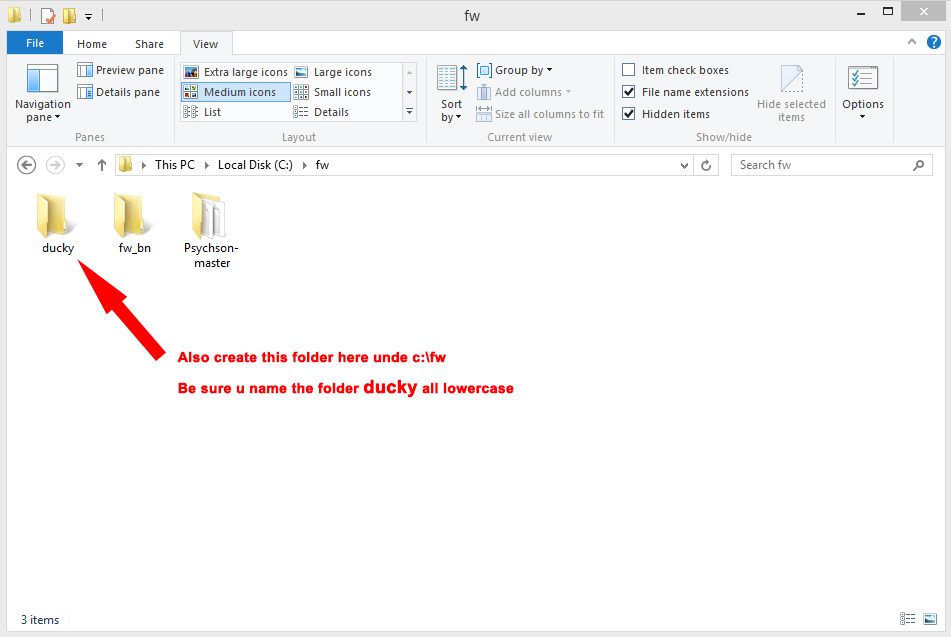
now create another folder called ducky like shown here
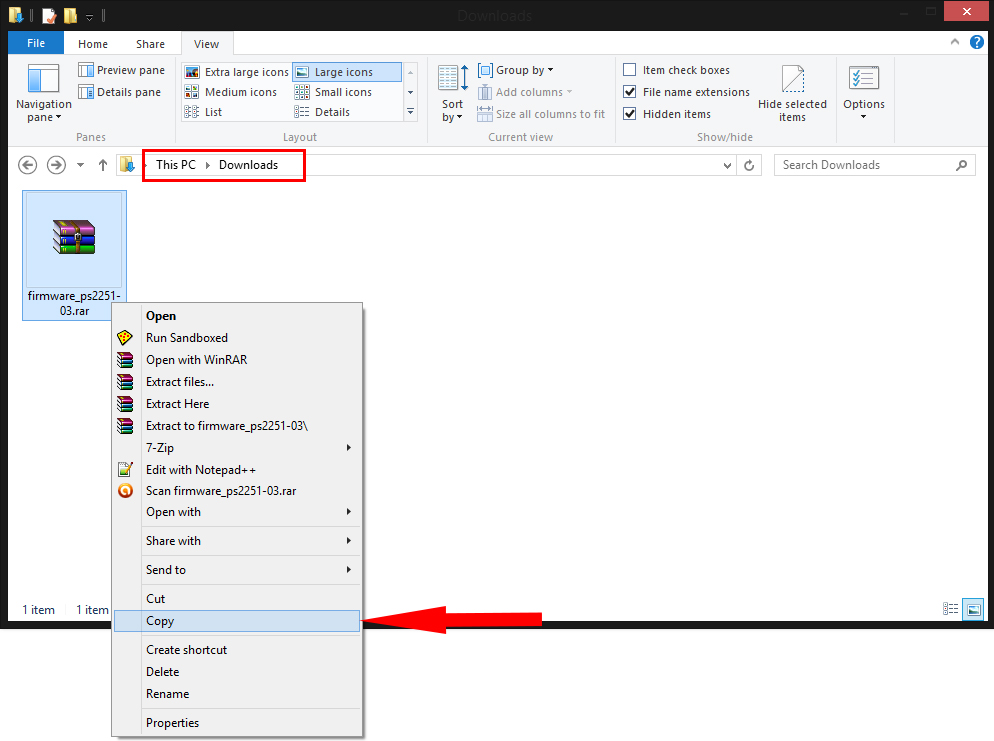
now on top u downloaded file six and it is named firmware_ps2251-03.rar
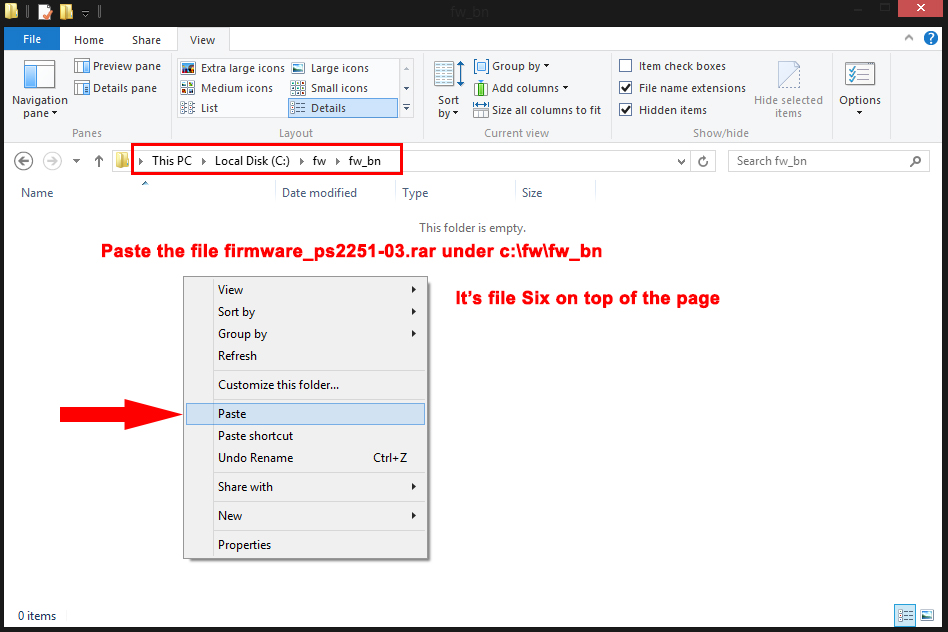
it should be in your Downloads folder at this time, but we need to place it in the fw_bn folder and extract it there
so copy the firmware_ps2251-03.rar file from your Downloads folder like shown below
and paste it under c:\fw\fw_bn
like shown here
And now that u pasted the file firmware_ps2251-03.rar here under c:\fw\fw_bn u should extract it here
like shown here
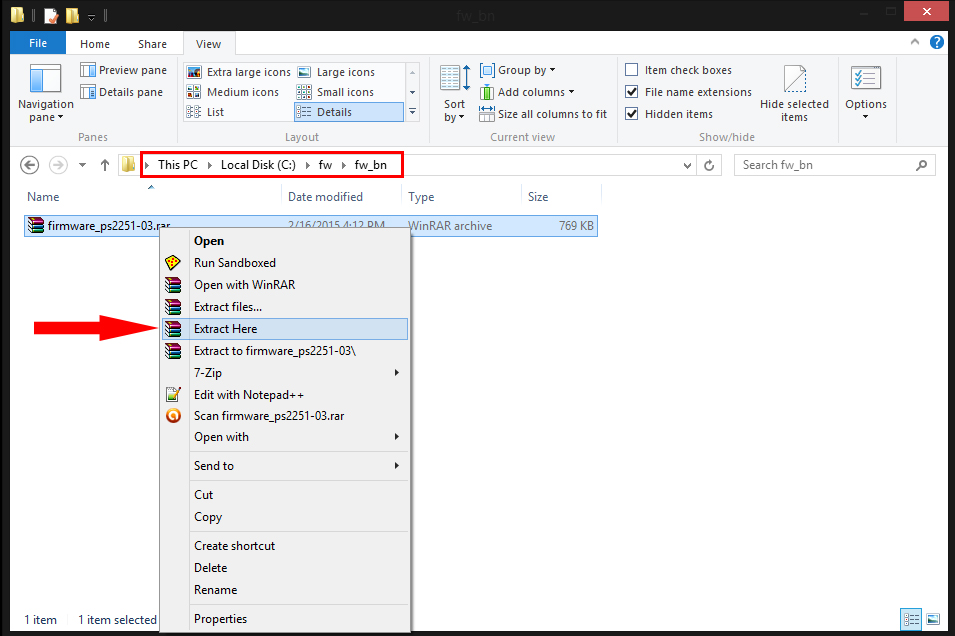
u should then have this
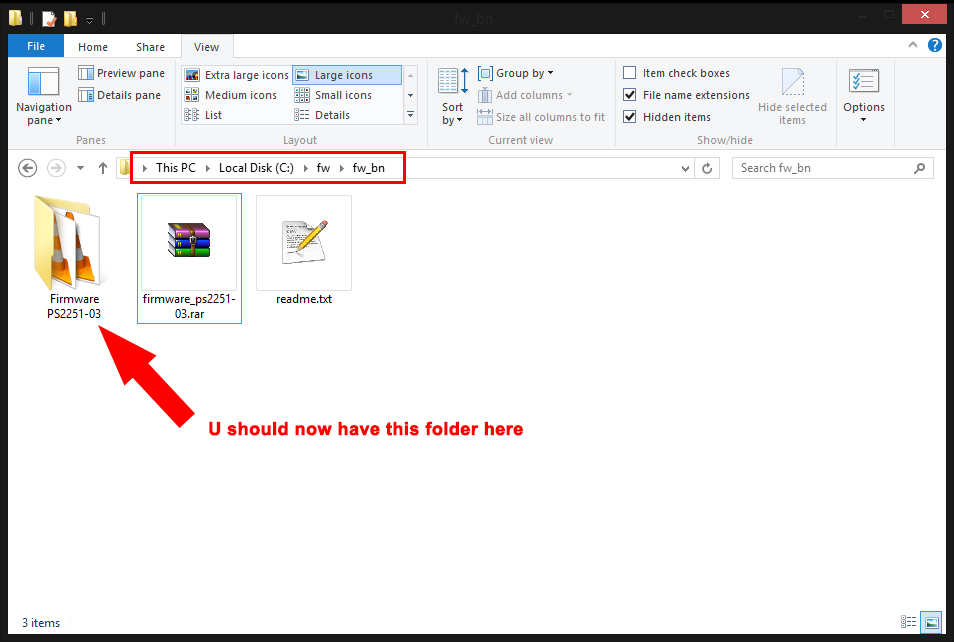
But now we need to get some files out off this folder and copy it to this location c:\fw\fw_bn
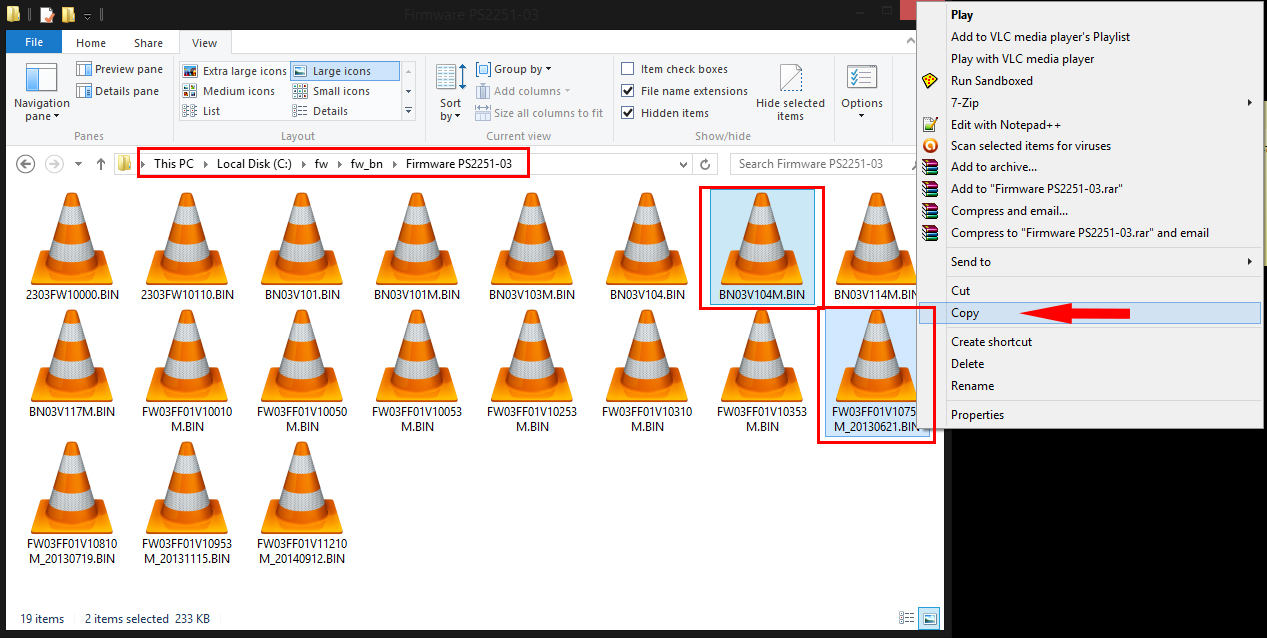
So open the folder Firmware PS2251-03 like shown here below and copy the files BN03V104M.BIN and FW03FF01V10753M_20130621.BIN
like shown here
So now that u copied these files go back one folder so to the folder c:\fw\fw_bn and paste these 2 files here
so like this
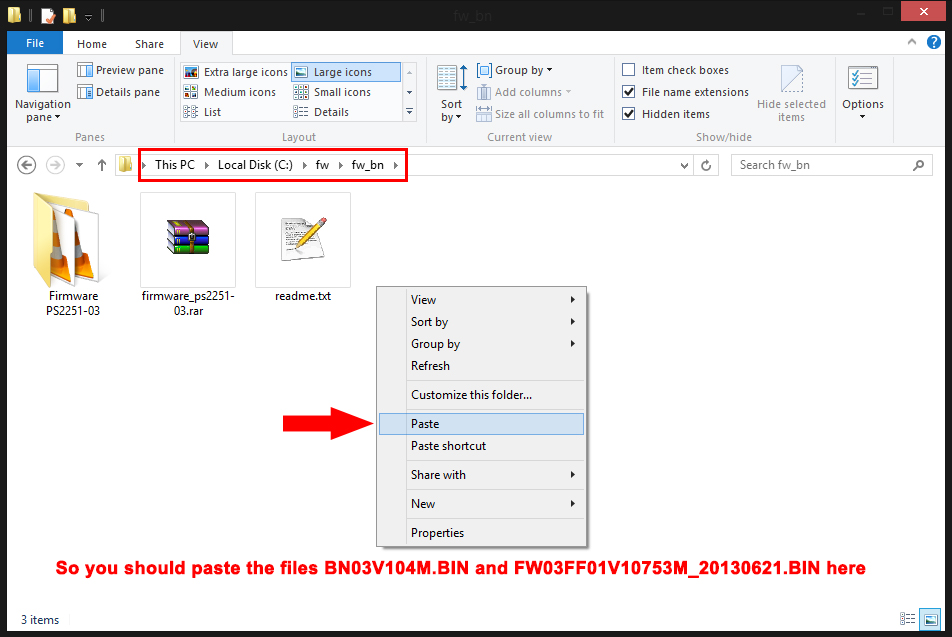
u should then have this
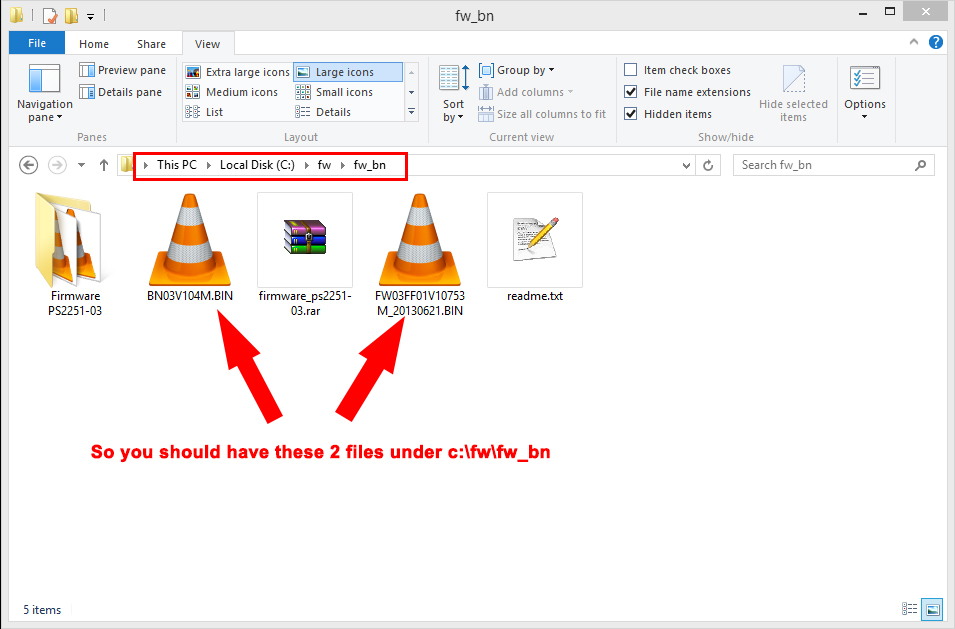
The files BN03V104M.BIN and FW03FF01V10753M_20130621.BIN under c:\fw\fw_bn
Now that this is done u should move on to the next step
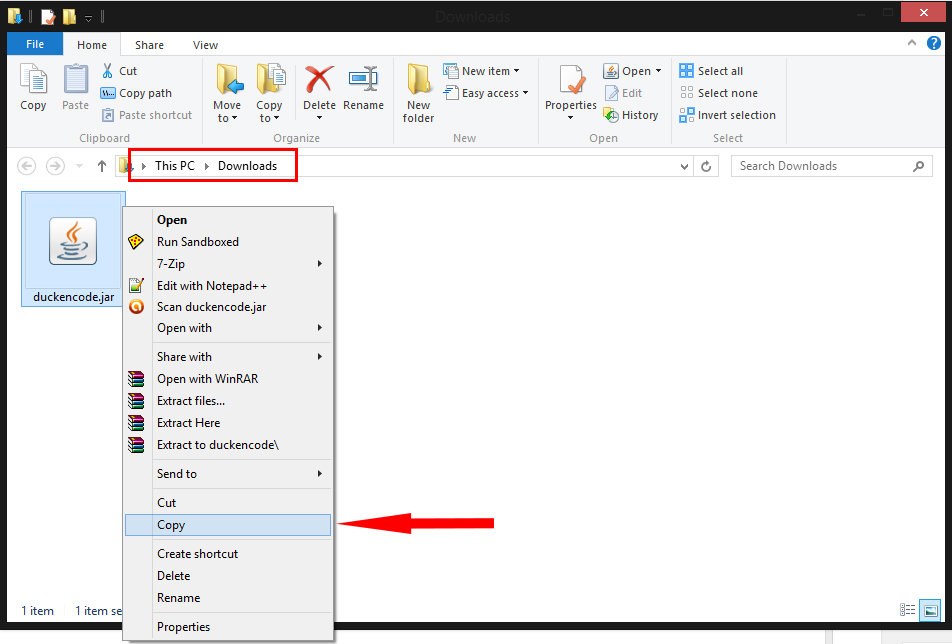
The next step is copying the file duckencoder.jar to c:\fw\ducky
So go to the location where u saved duckencoder.jar my is still under Downloads so i need to copy it
like shown here
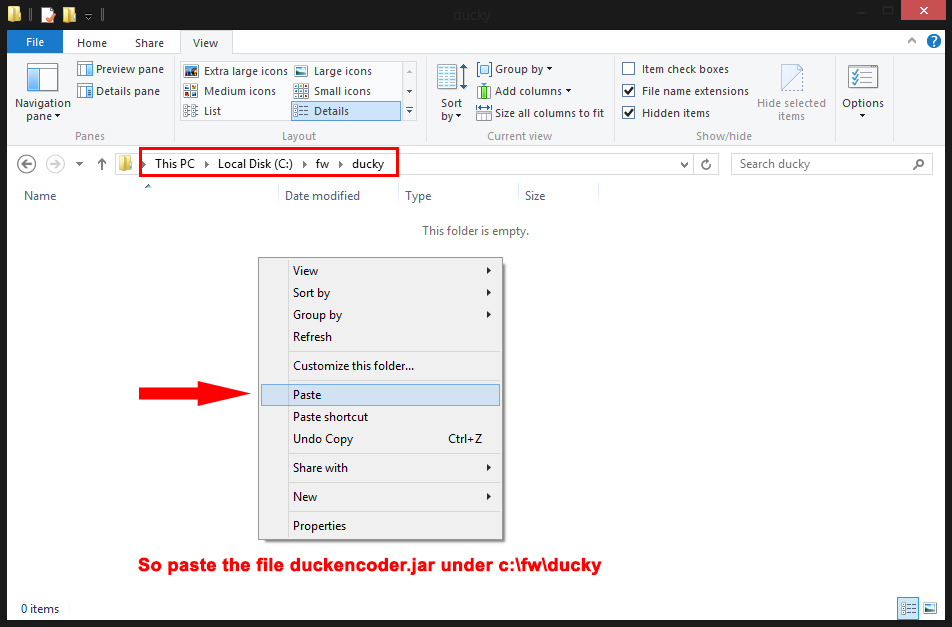
now that u copied this file we should move it to c:\fw\ducky
so go to the location c:\fw\ducky and paste the file duckencoder.jar here
like shown here
u should then have this
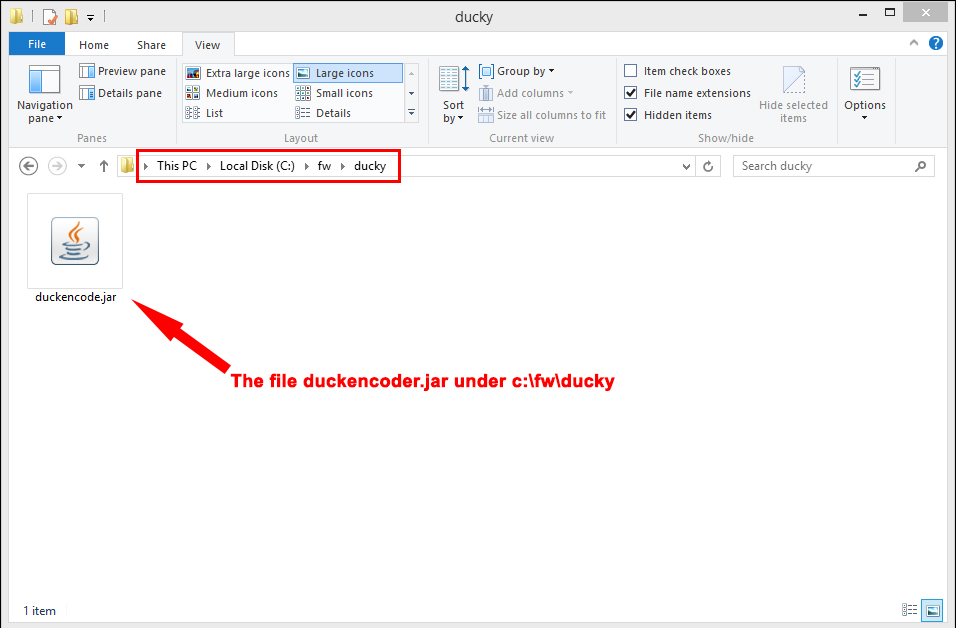
the file duckencoder.jar in the folder c:\fw\ducky
so you should now have the folders ducky, fw_bn and Psychson-master in c:\fw
like shown here
So listed out for u once more
duckencoder.jar (file five on top) under c:\fw\ducky
BN03V104M.BIN and FW03FF01V10753M_20130621.BIN (file six on top) under c:\fw\fw_bn
and the extracted github zip file (file one on top) under c:\fw (the folder in the zipfile from github is already called Psychson-master) so make sure u don’t have this folders double!
Now we are ready with putting all the files in place!
COMPILING ALL THE THINGS
So the next step is to compile all the stuff
So go to c:\fw\Psychson-master\DriveCom
and open the file DriveCom.sln
like shown here
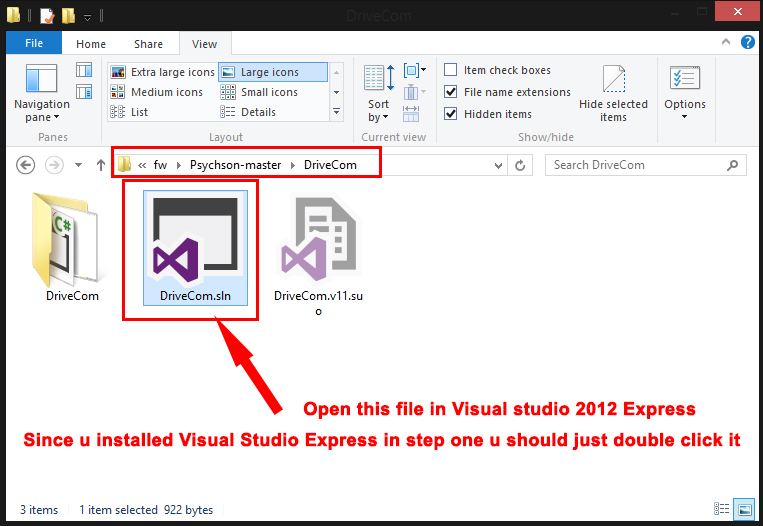
So you should just double click on DriveCom.sln
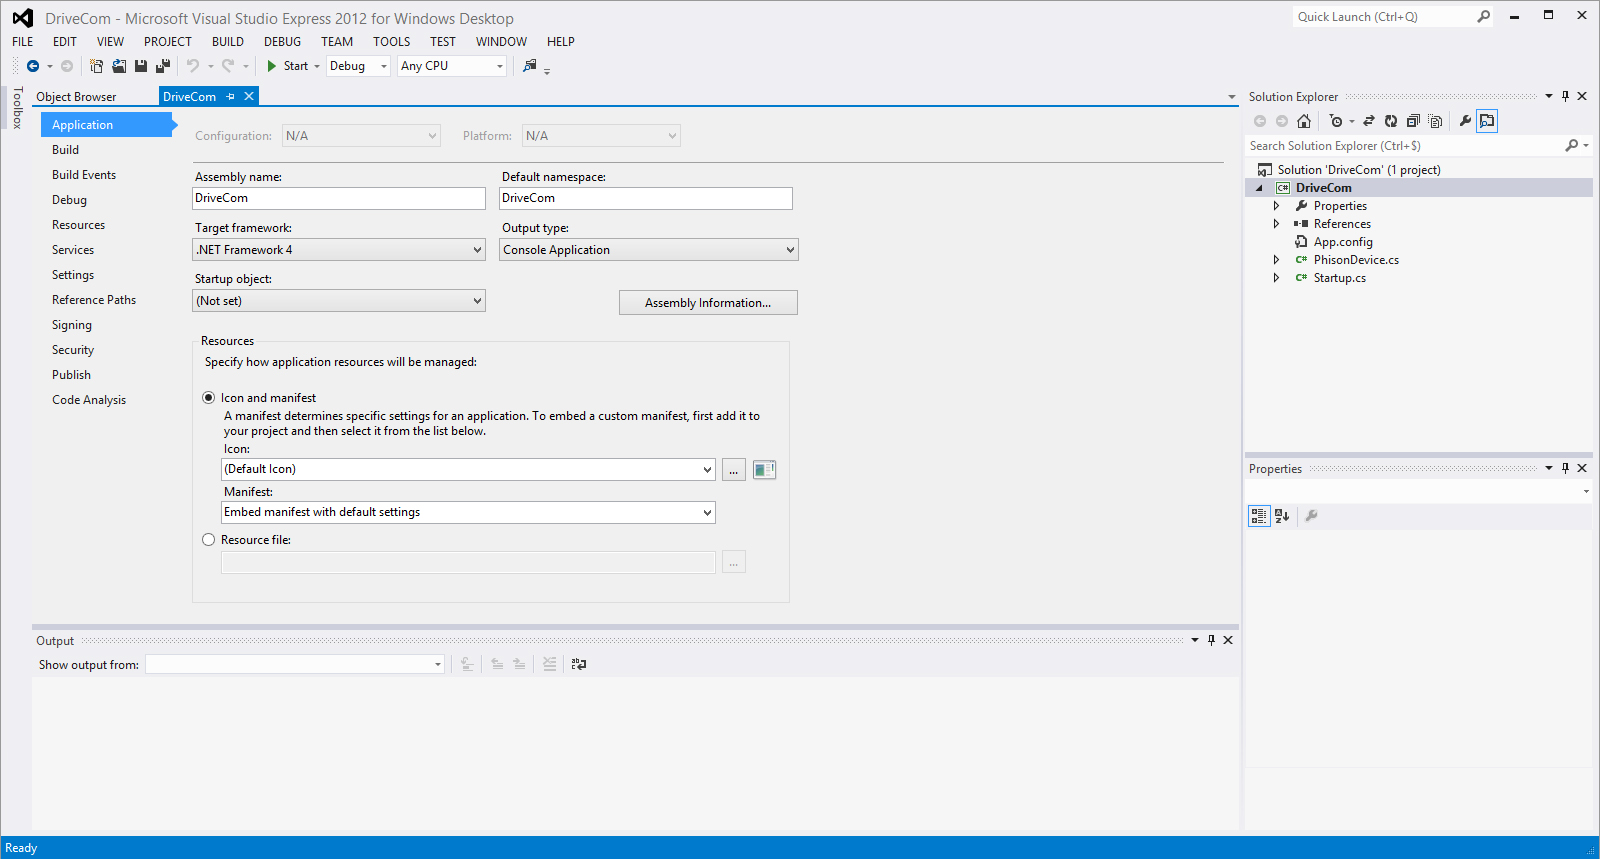
and get this
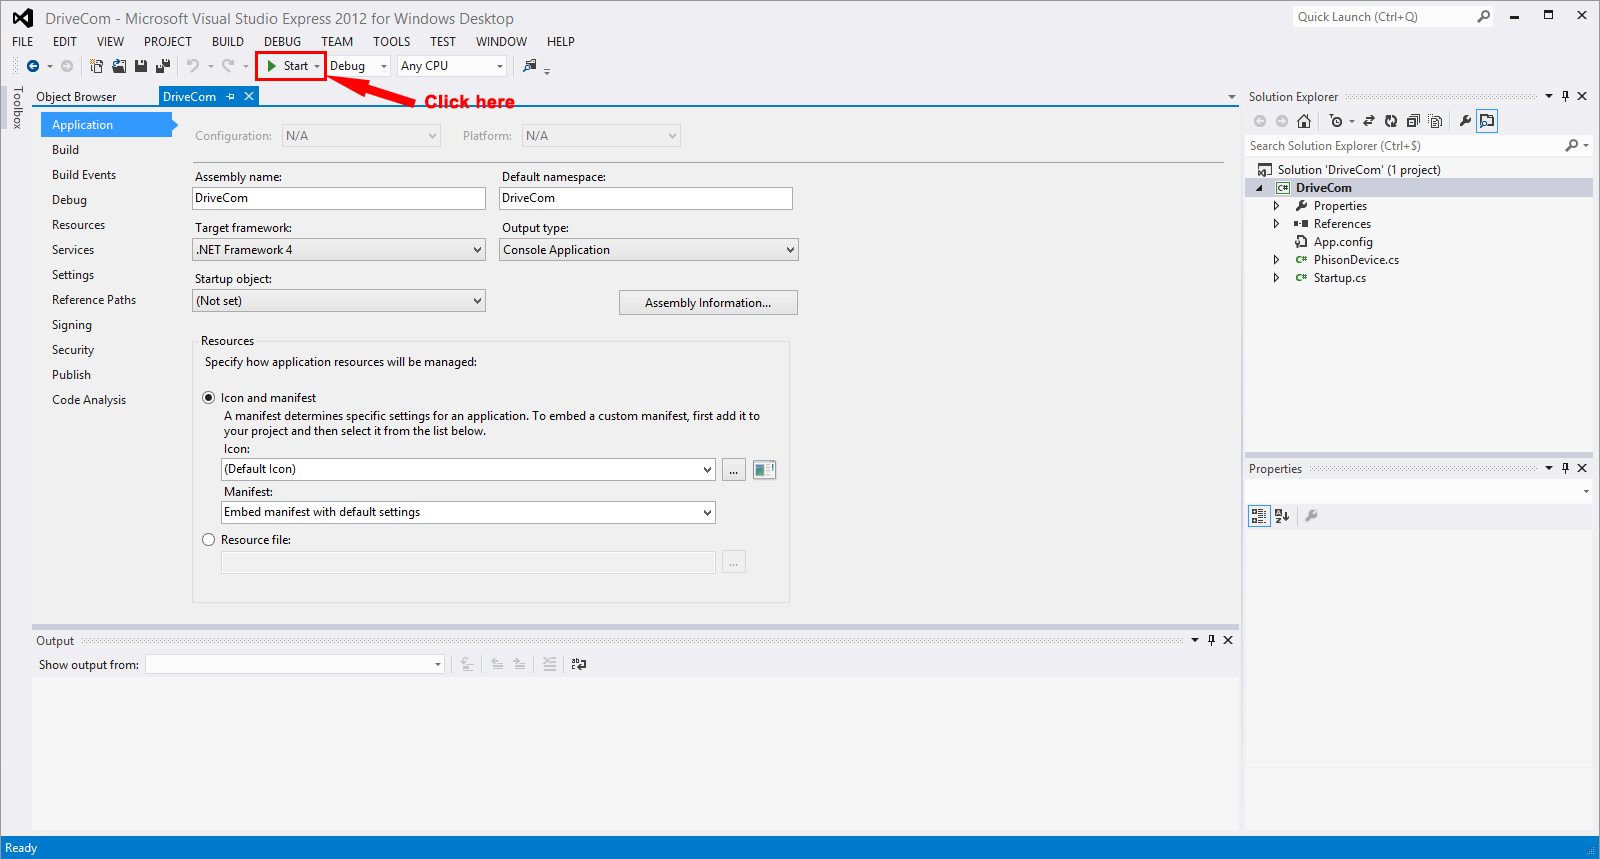
now that u see this u should click in the top bar on Start
like shown here
Once u clicked on start u should see this
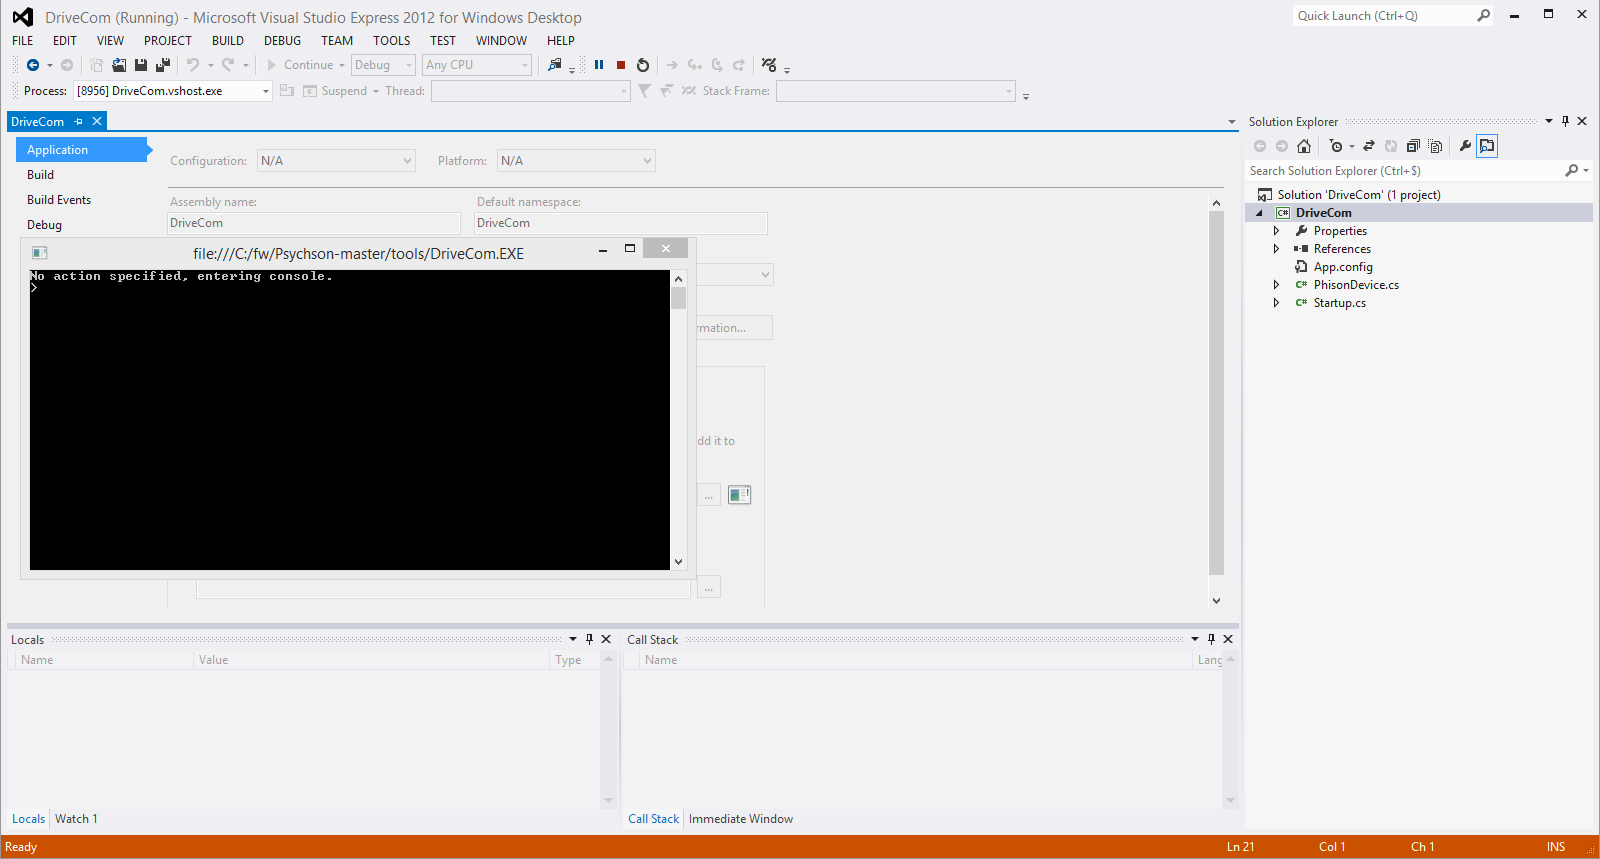
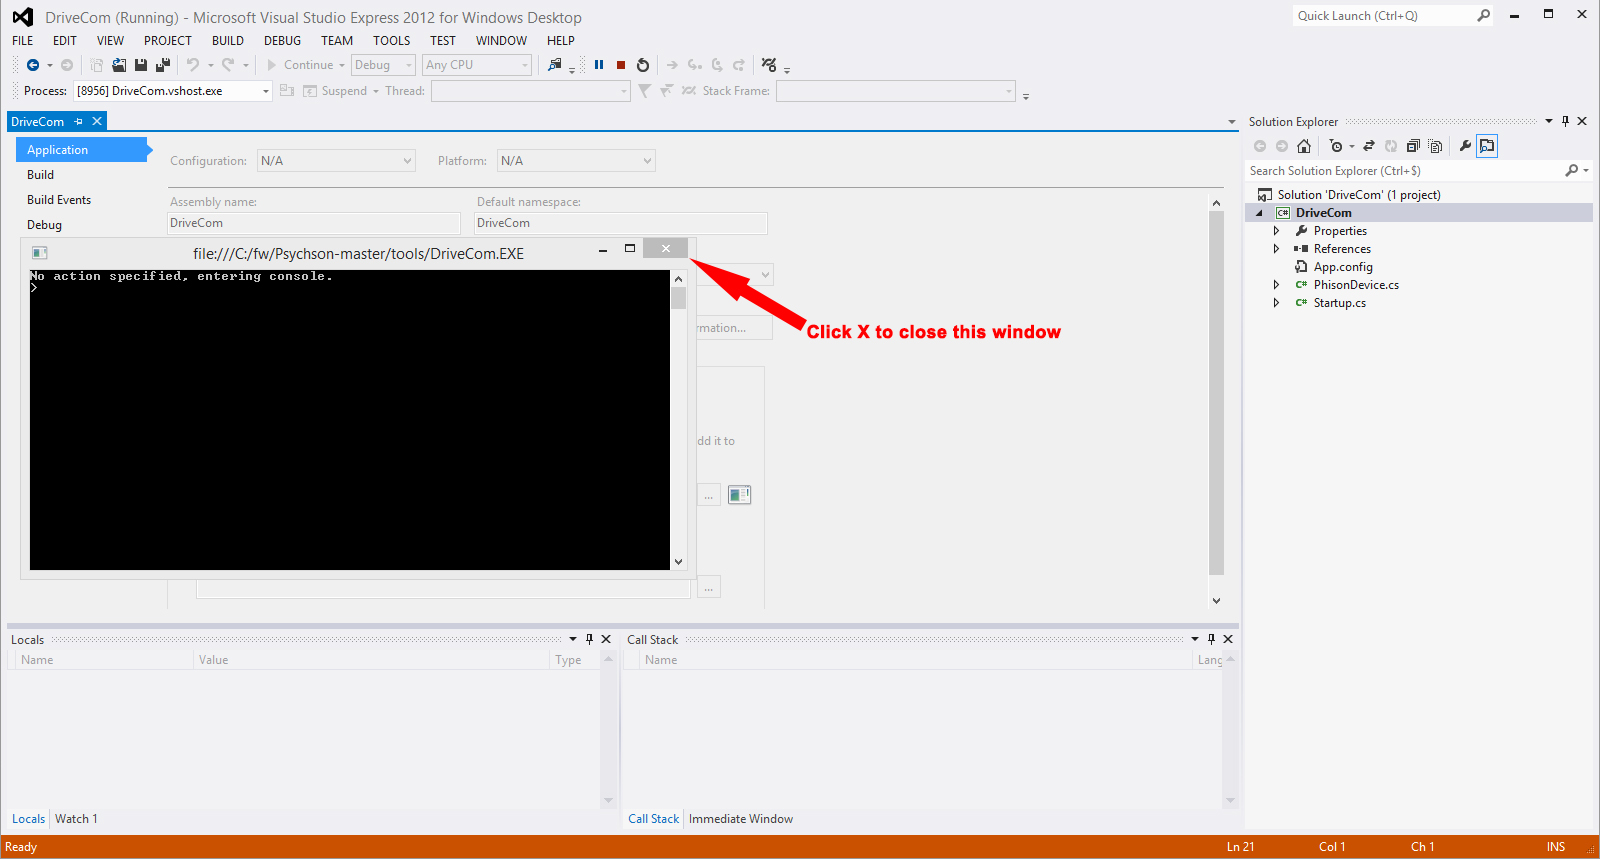
Now that u see this u should Close the window where it says “No action specified, entering console” First
like shown here
after u closed the command prompt window u should close the Visual Studio
like shown here

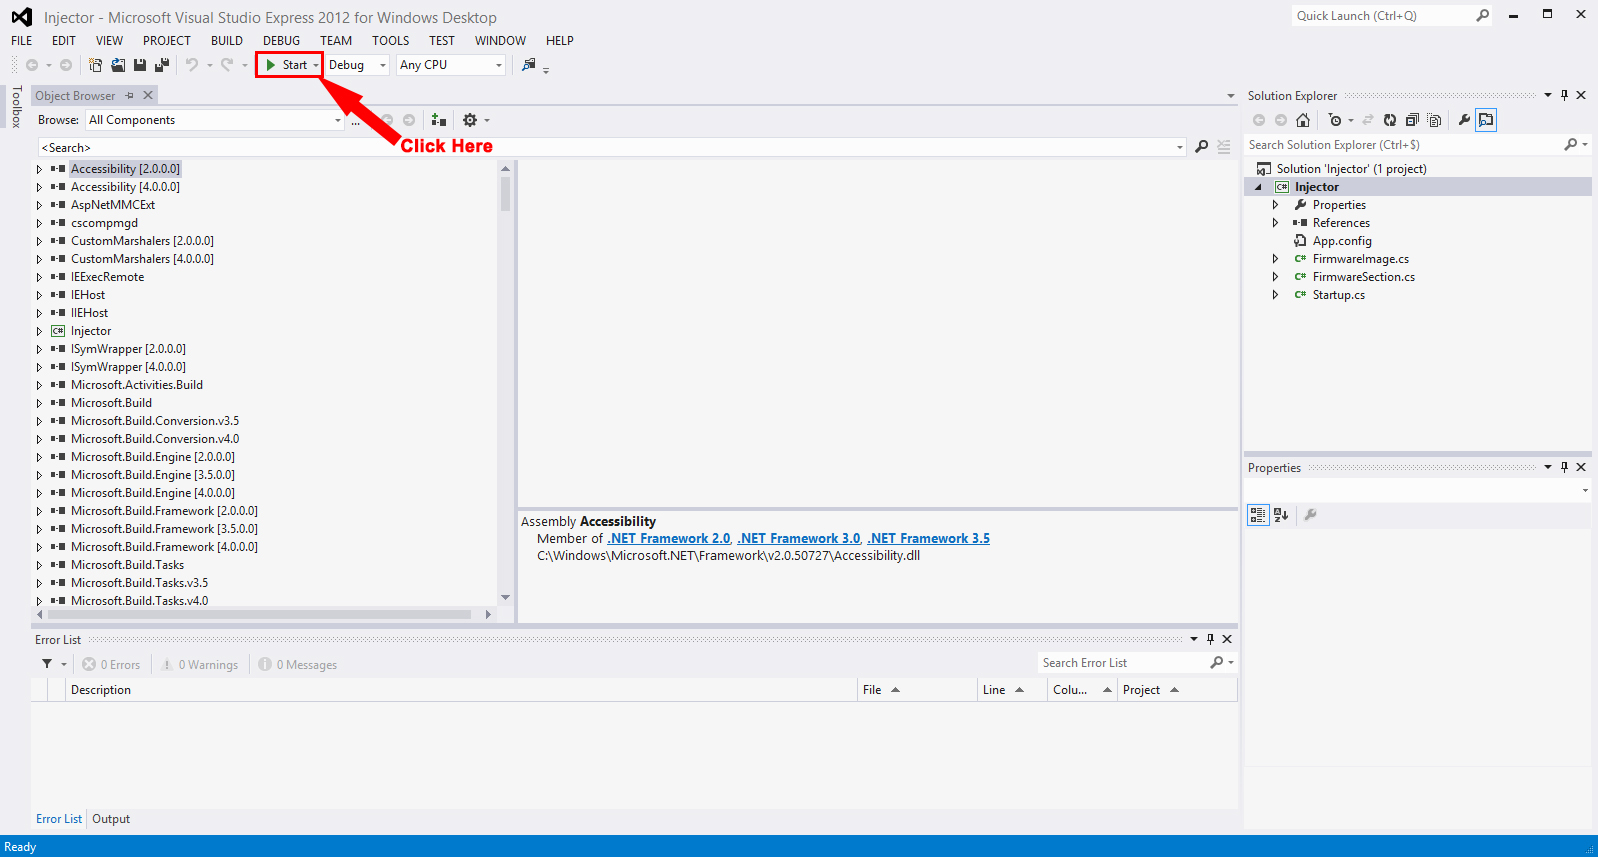
Now go to c:\fw\Psychson-master\Injector
like seen here
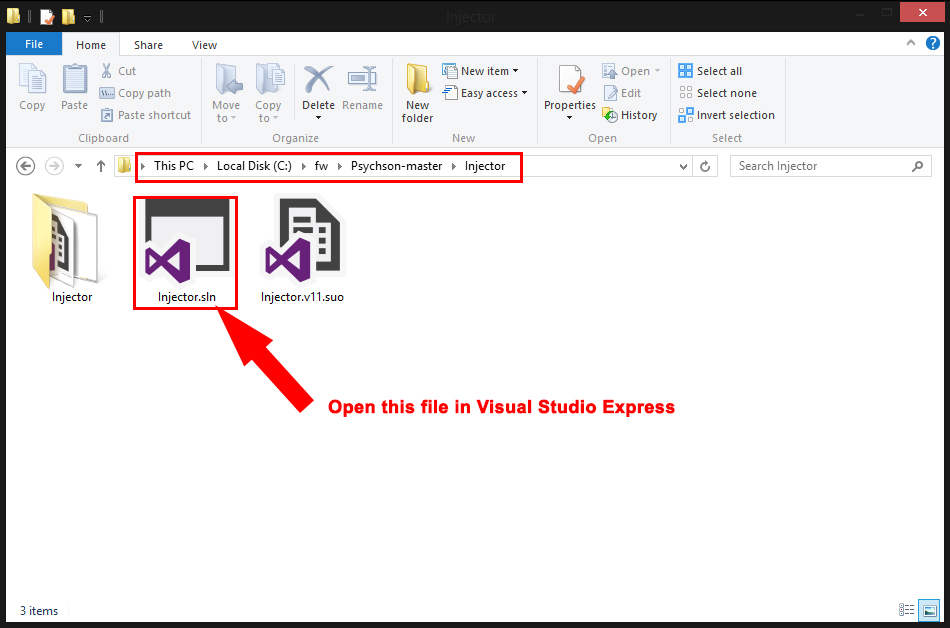
And double click on Injector.sln to open it in Visual Studio Express
u should then see this
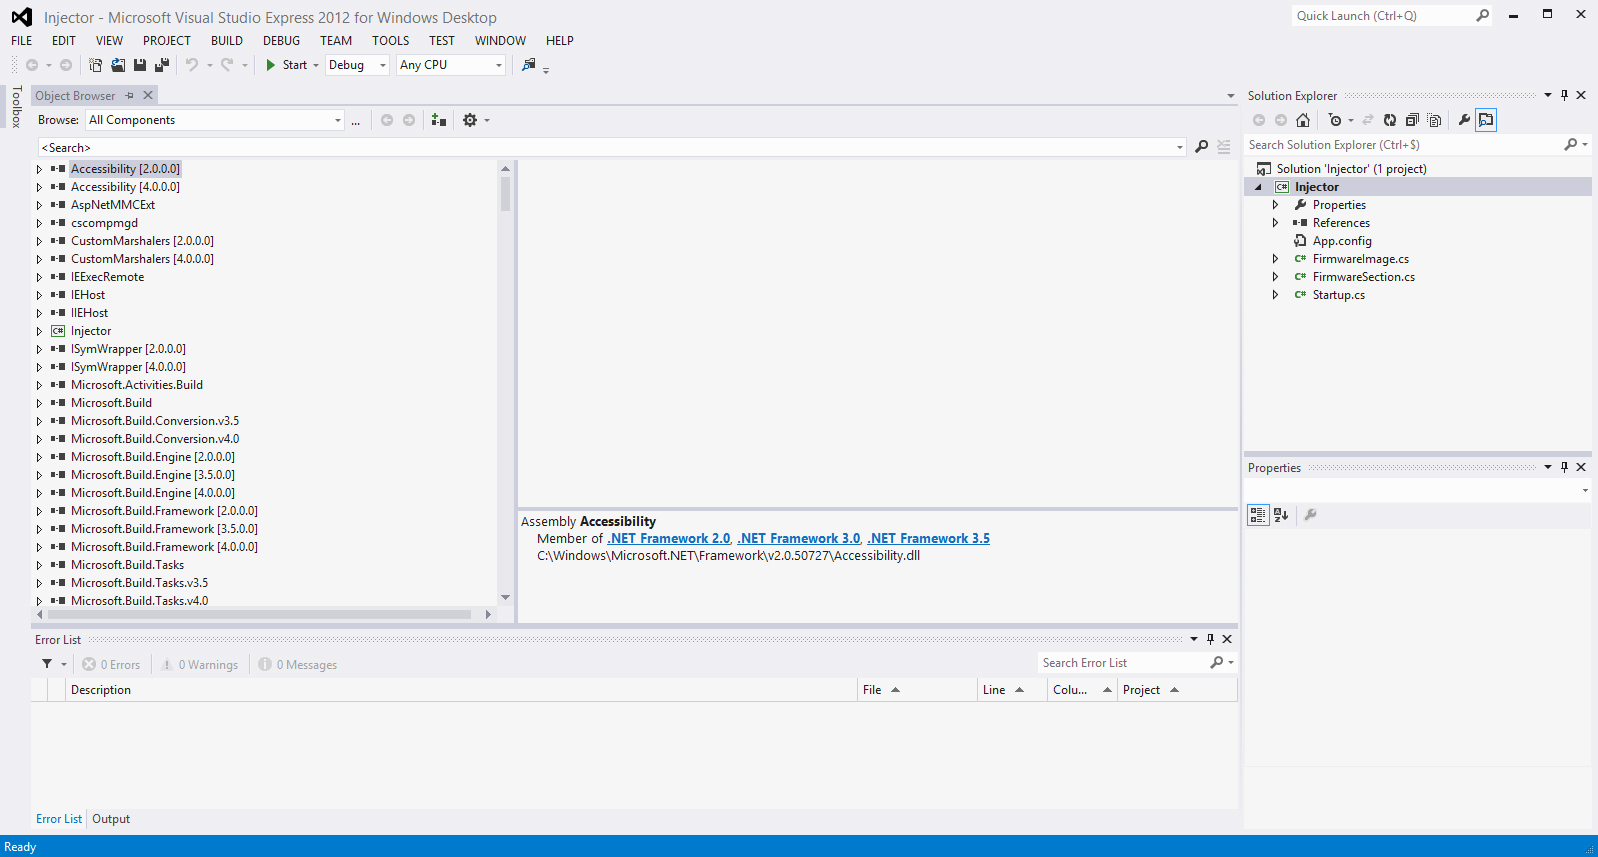
again now that u see this u should click in the top bar on Start
like shown here
now once you clicked start u should get this
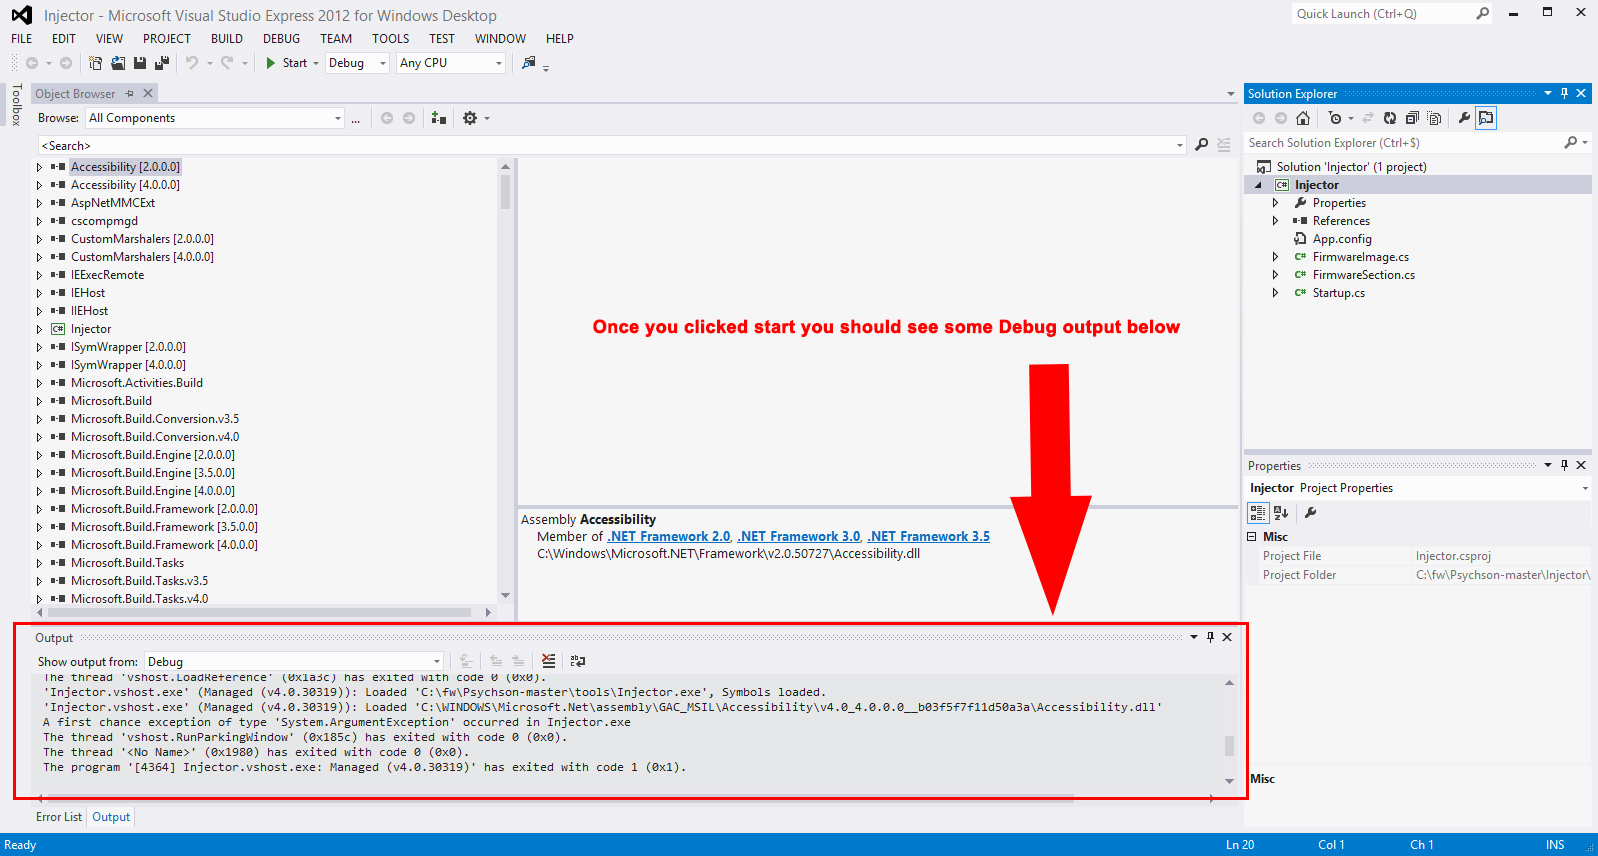
you should see some text in Output
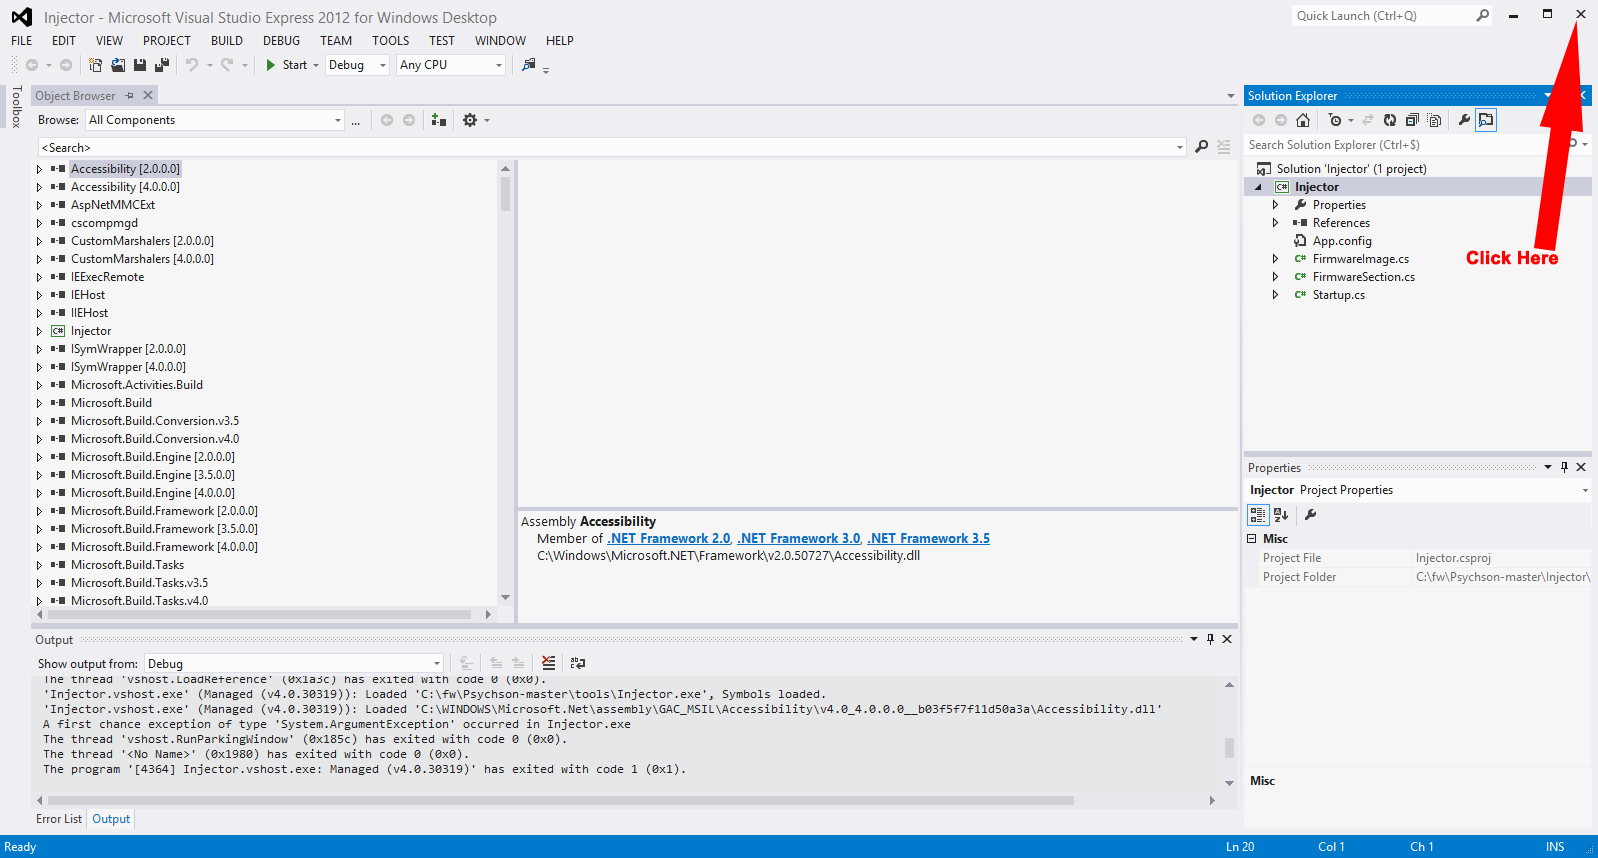
so next close Visual Studio again
like shown here
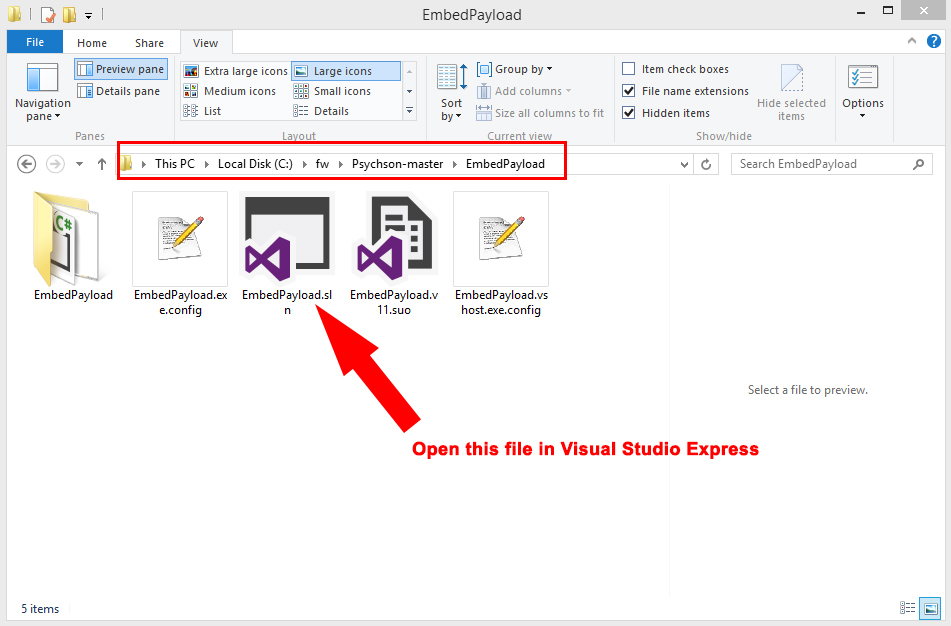
So once you clicked the close button we should now go to following location
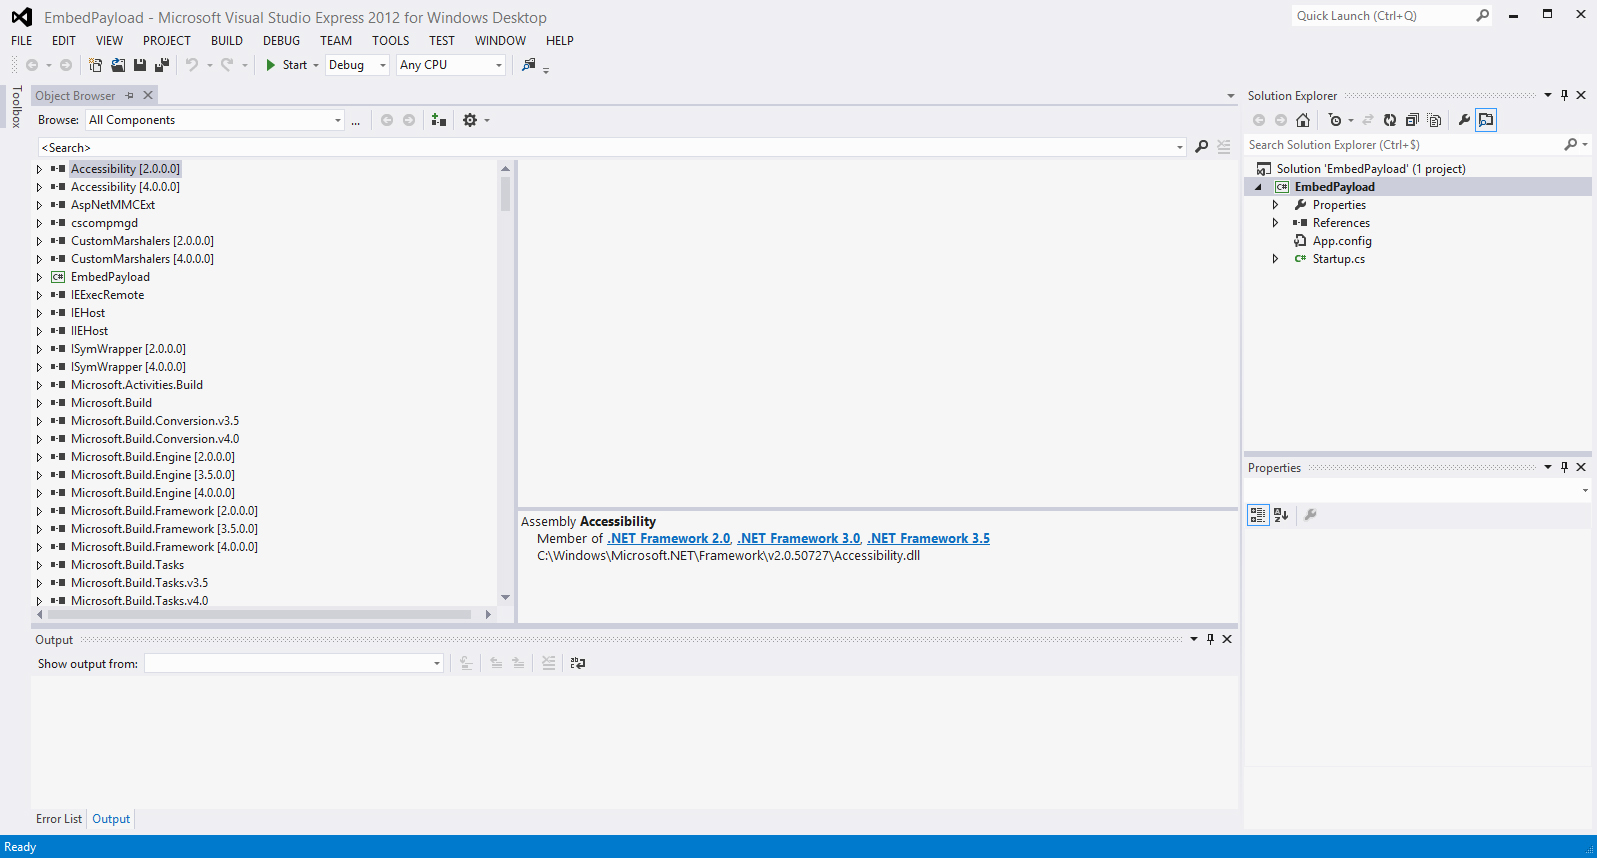
c:\fw\Psychson-master\EmbedPayload
and open the file EmbedPayload.sln
like shown here
Now once you double clicked this file u should see this
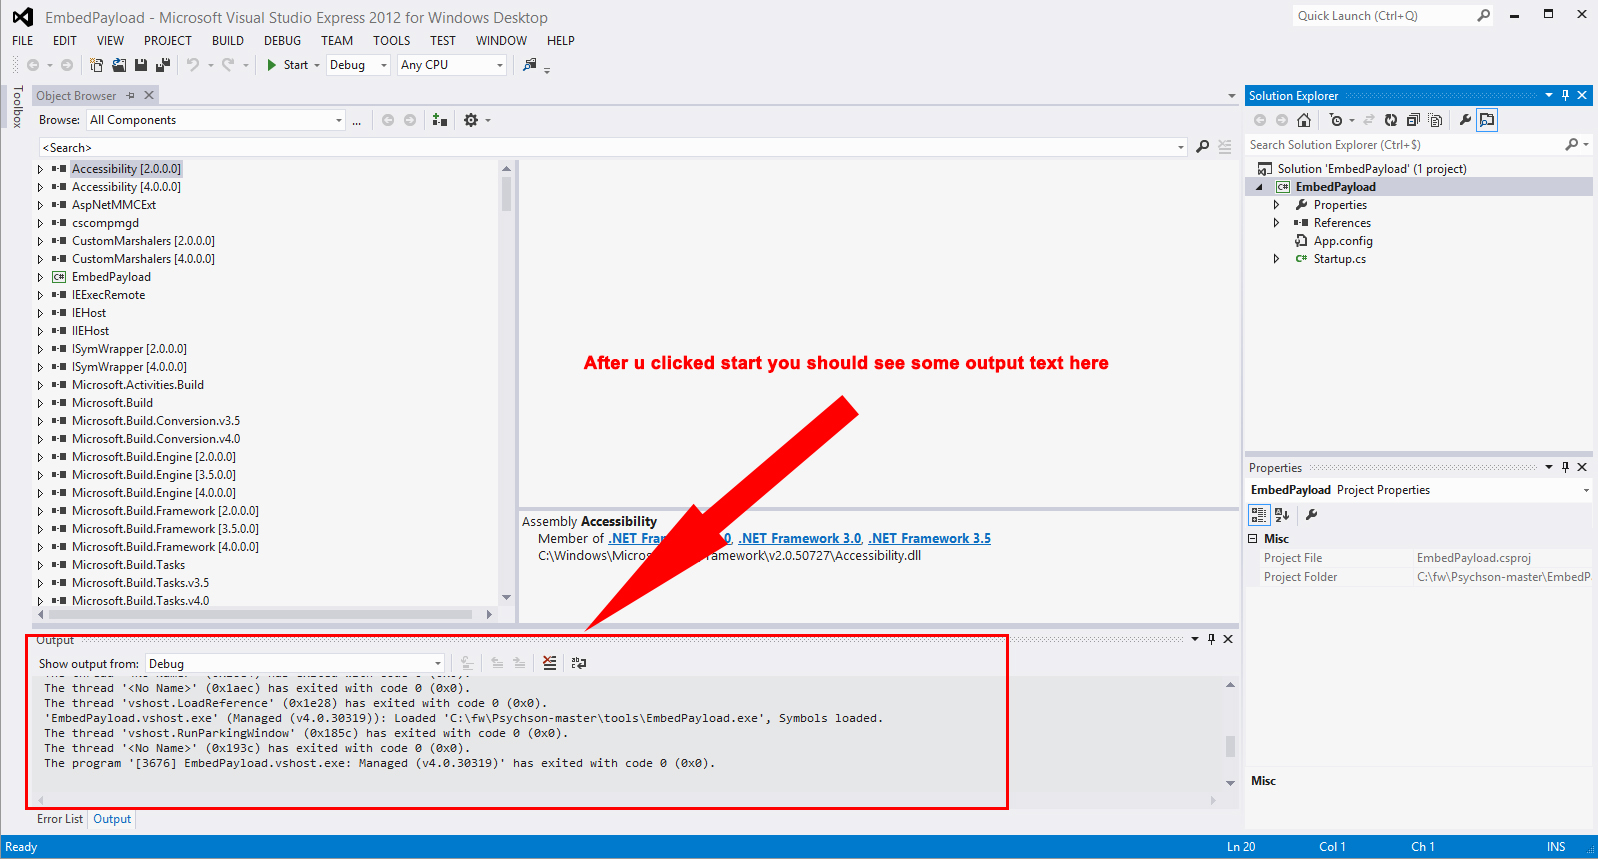
now that u see this u should click in the top bar on Start
like shown here

Once you did click in start you should again see some output text below
like seen here
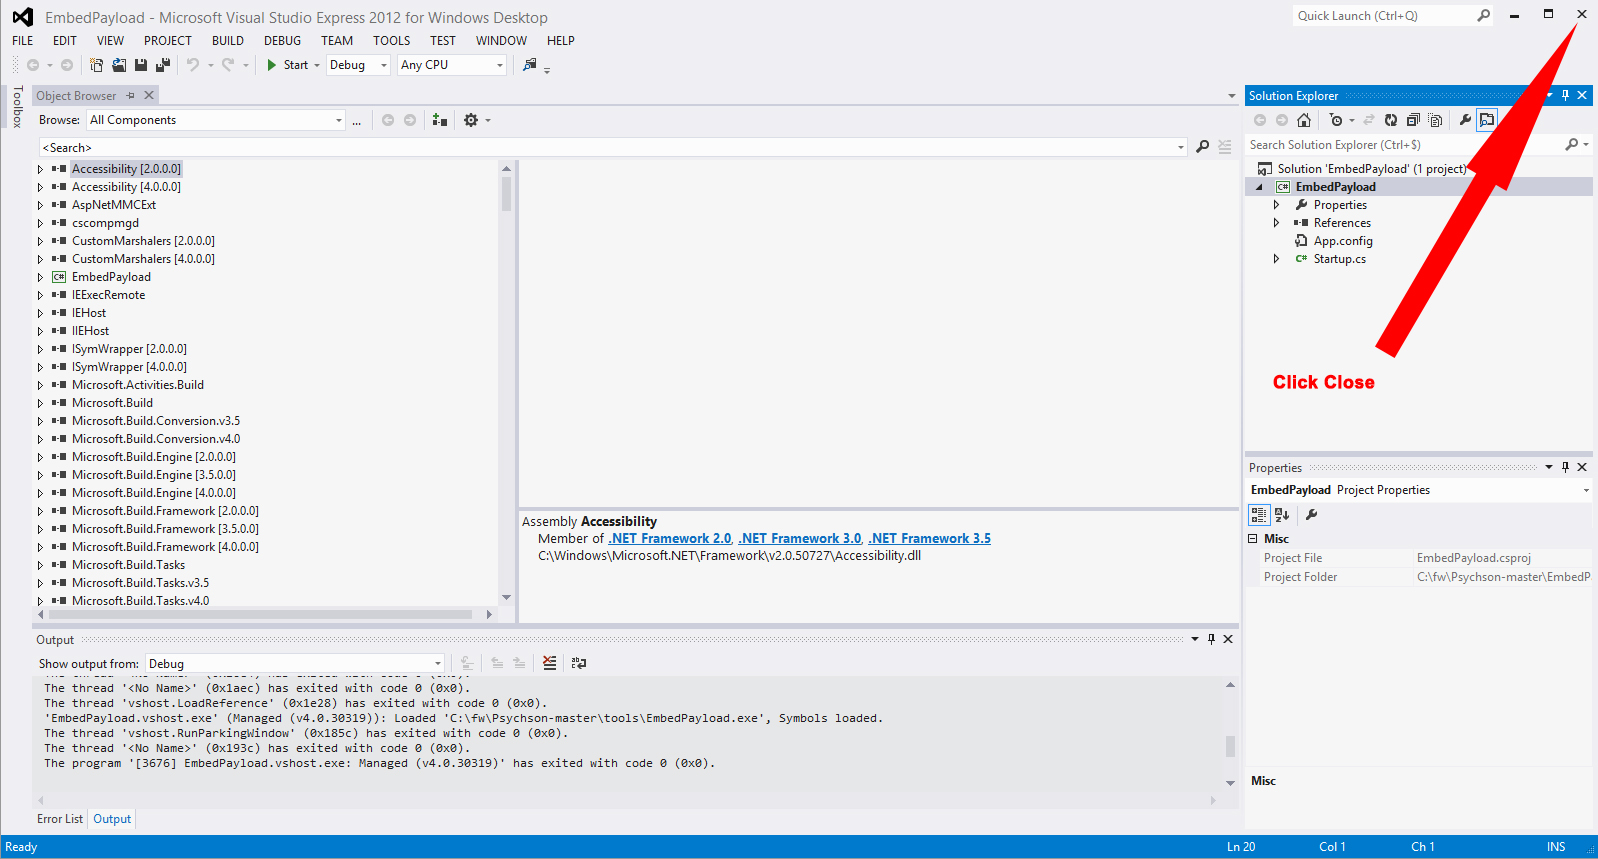
 now that this is done close Visual Studio again like shown here
Now all the compiling is done so let’s get one more thing we need to make it complete
the thing we need is a script for putting on the self made USB rubber ducky
we will be getting the Hello world script from the github
so go to to this website : LINK
you will then see this
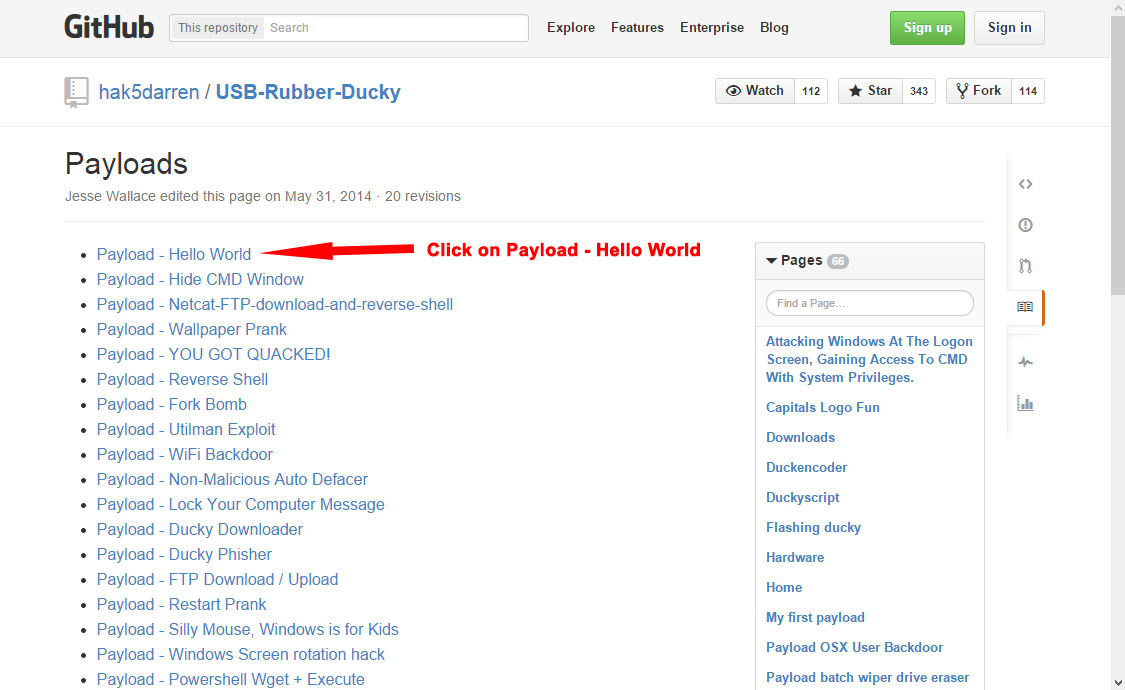
So as you see in the picture u now need to click on the link to Payload – Hello World
u will then come to this page
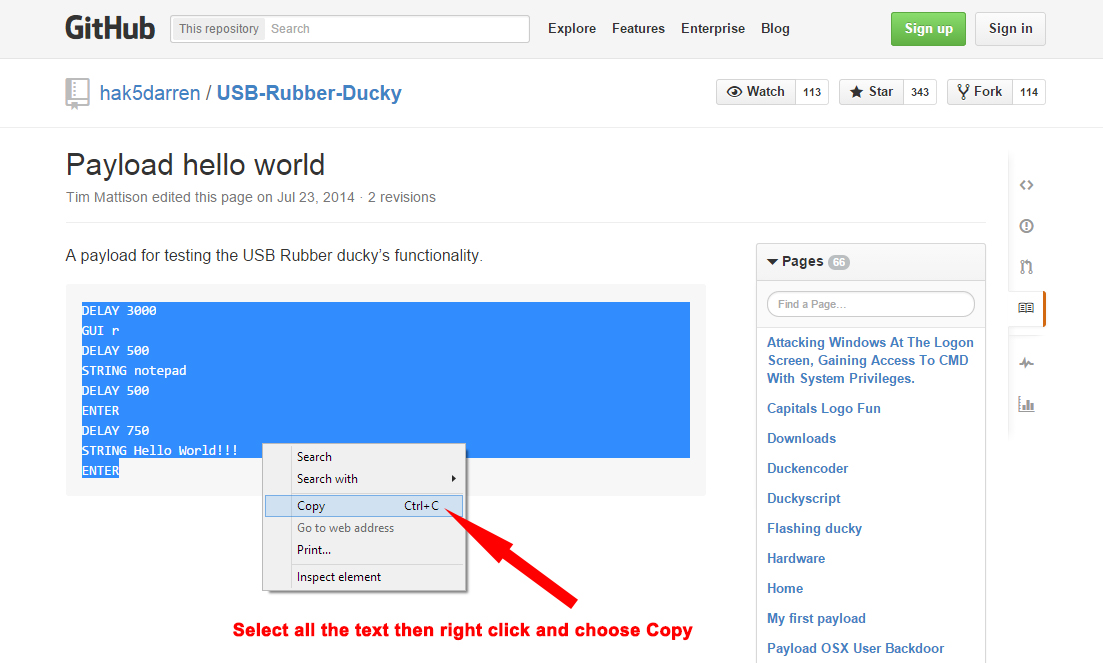
so as you see in the picture we need to select all the text marked in blue and then right click and choose Copy
Now that u copied this text we need to go to the following location
c:\fw\ducky
and create a new text file
like shown here
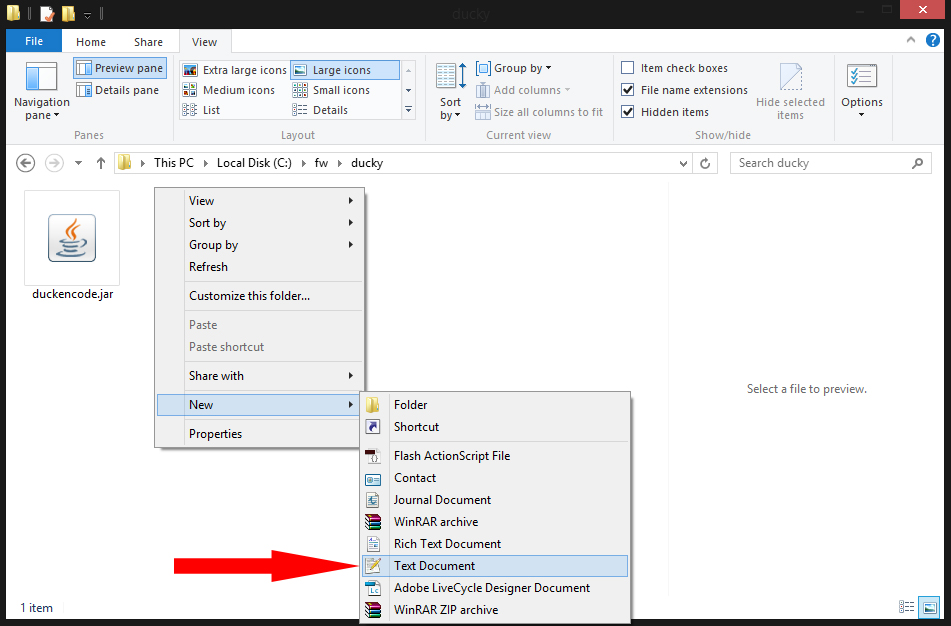
And name the file HelloWorld.txt
like shown here
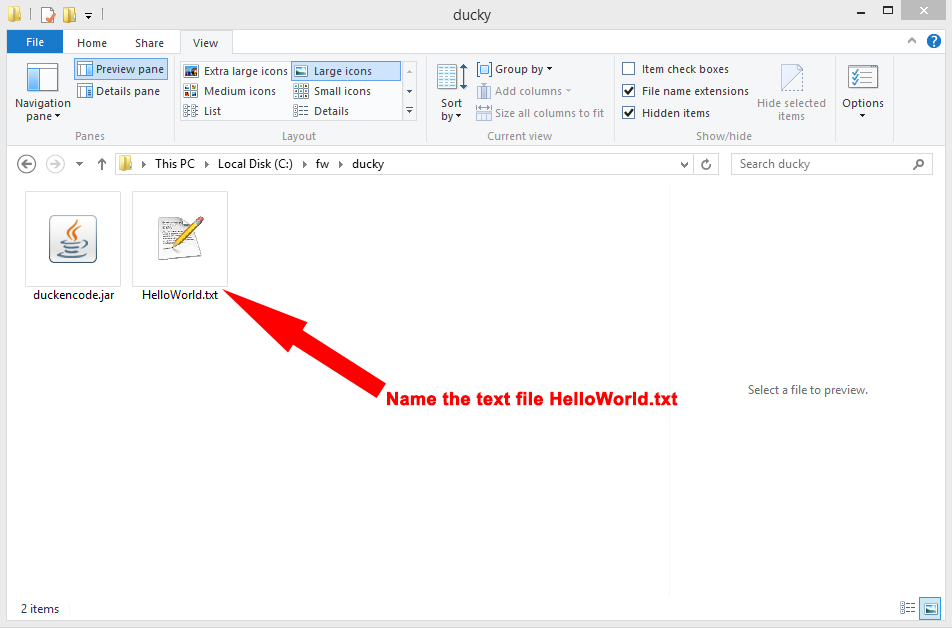
now that u created the text file HelloWorld.txt under c:\fw\ducky
open it by double clicking on it
and then we need to paste the code we copied from the github page inside the HelloWorld.txt
so in the empty document right click and choose Paste
and you should then have this
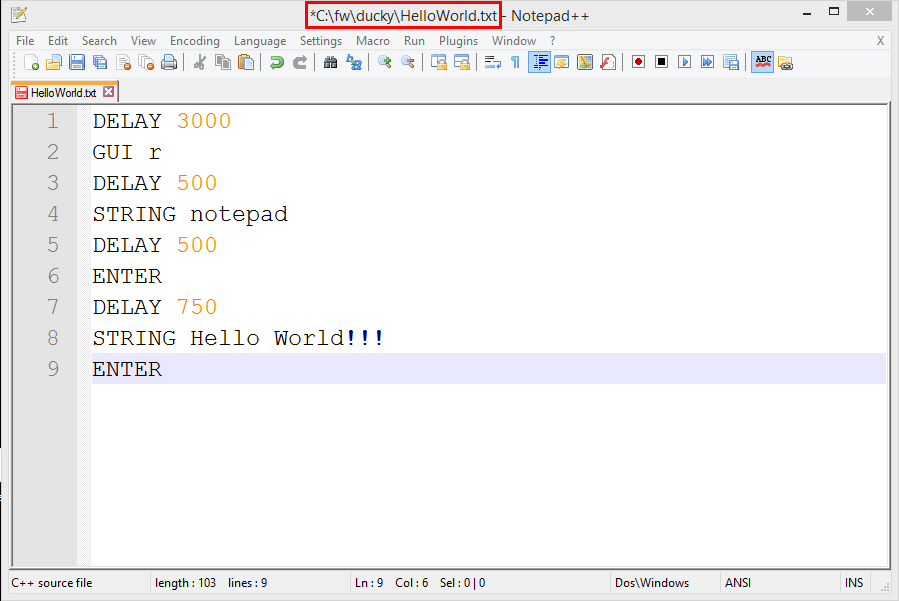
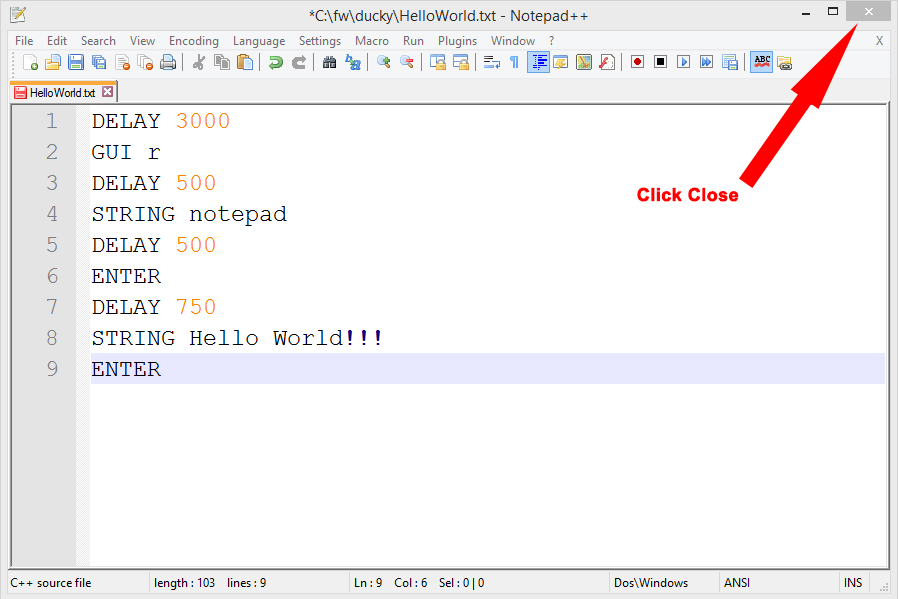
Now that the code is inside we need to save it

and close it like seen here below
So now that this is done we can start playing with the stick
First we are going to check if the stick really has the Phison 2251-03 (2303) chipset
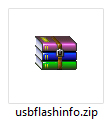
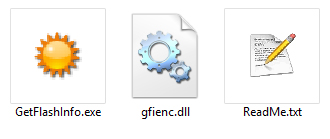
we can check this by downloading the software called GetFlashInfo
get it from this LINK
when downloaded go to the location u saved it to mine is standard in Downloads
u should there see the zip file u downloaded
now right click on this and choose Extract here
like shown here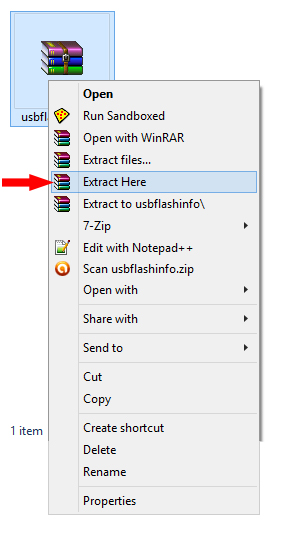
u should then open the folder named usbflashinfo
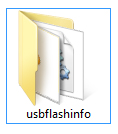
so double click on this folder and you should then see these files
So now Insert your USB stick and double click on GetFlashInfo.exe
u should then see this
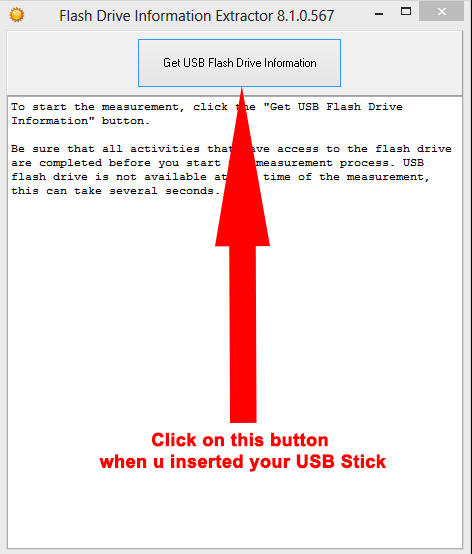 u should get this back as response
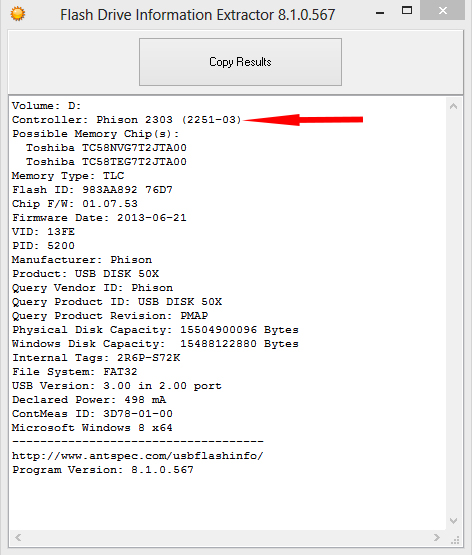
It’s very important that u get Phison 2303 (2251-03) as Controller
Normally if you bought a USB stick from my webshop it should be fine!
So now that we now for sure that the stick u have has the right nand chipset we can start making the USB Rubber Ducky
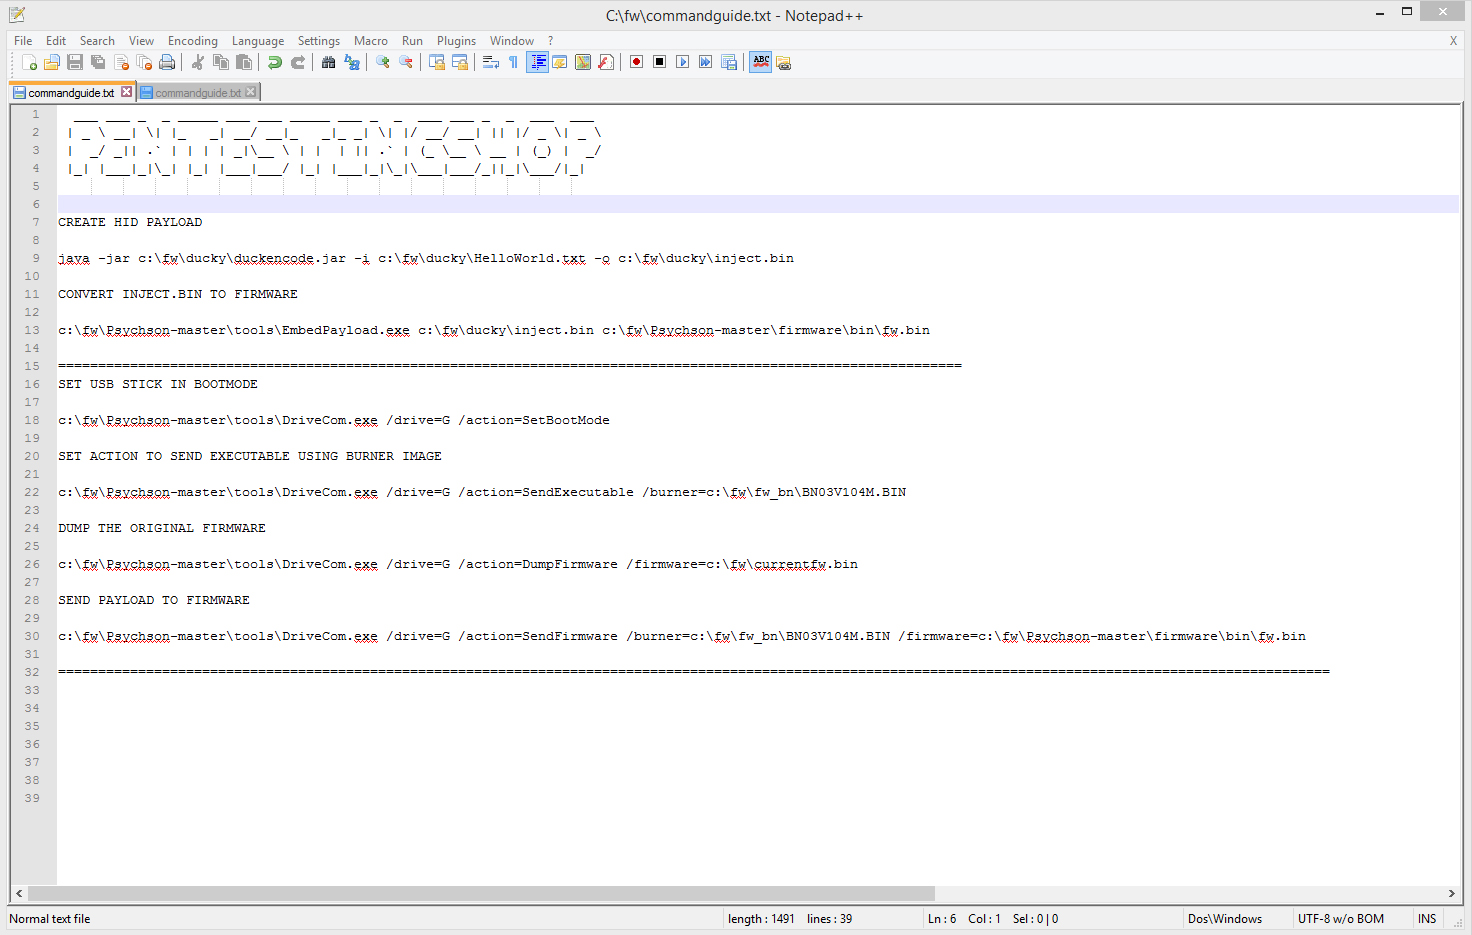
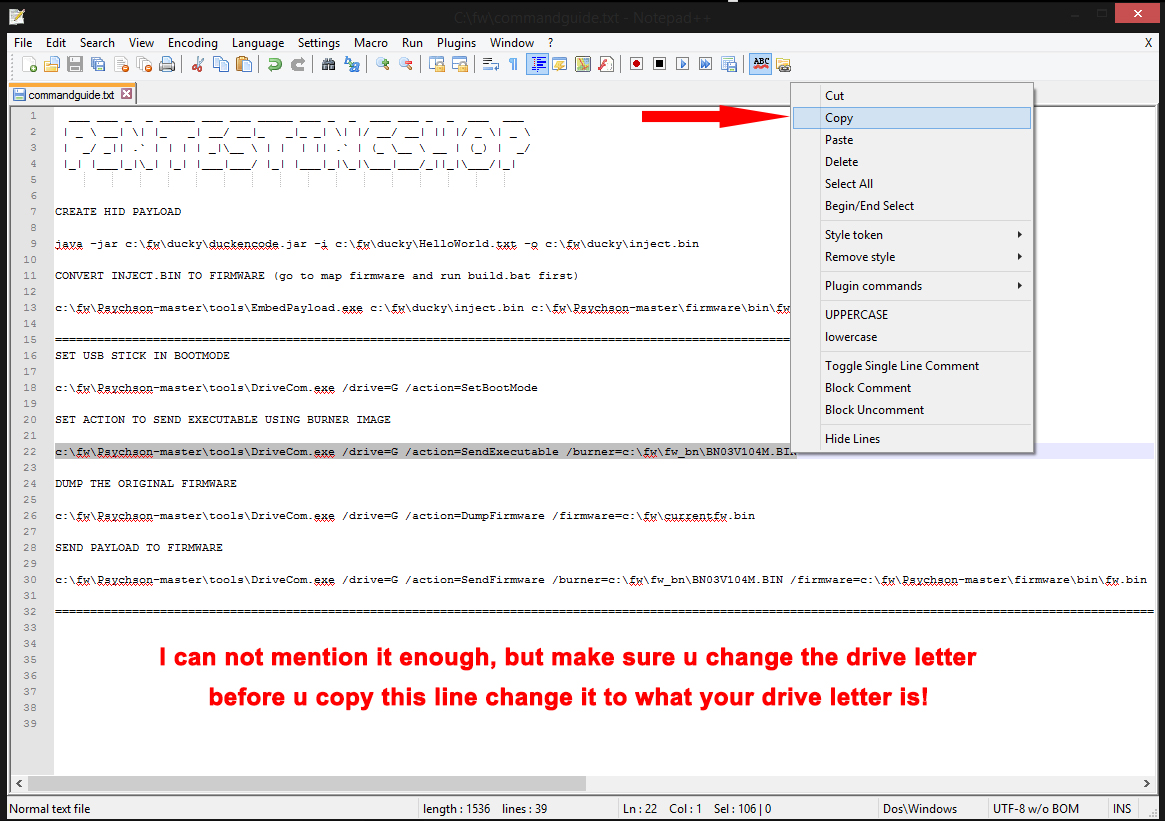
so first download this file i created with all the commands u will need for making the USB Rubber Ducky
from this LINK
For convenient work save the file under c:\fw
so you should now have this file like shown here
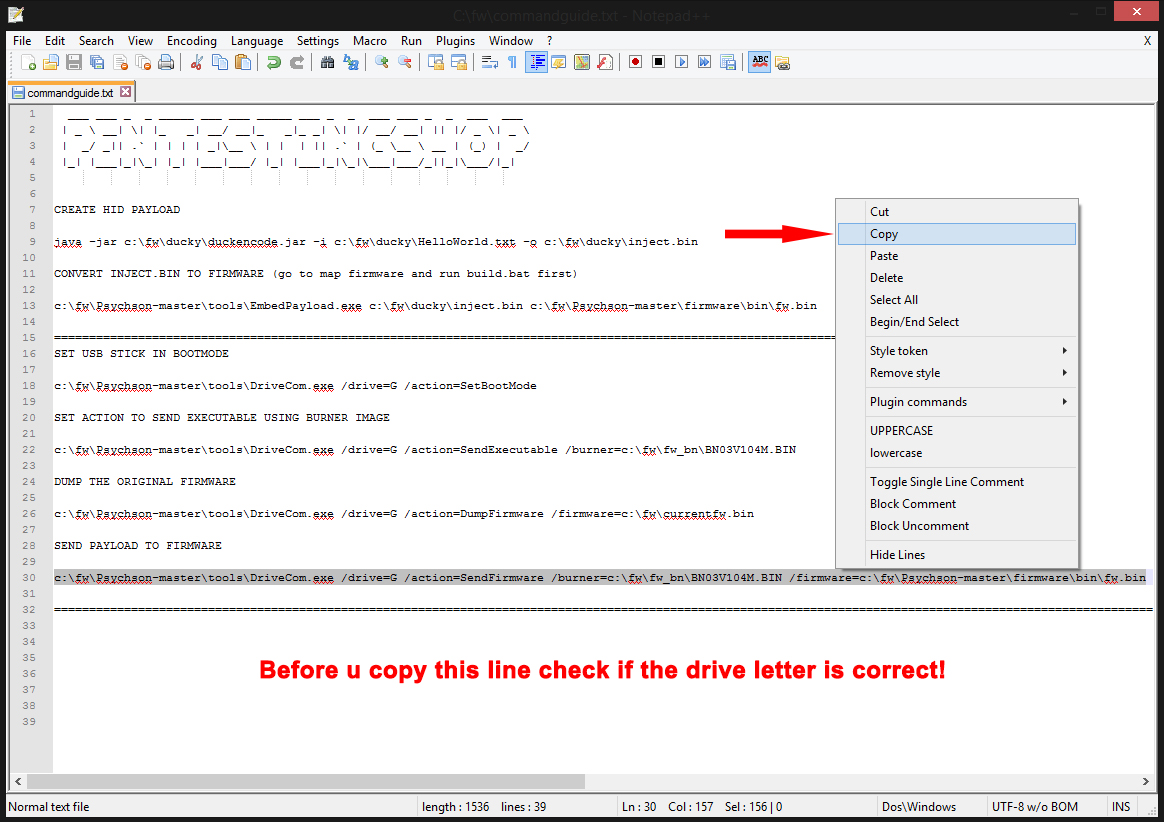
So now that u have my commandsguide.txt file double click on it and you should see this
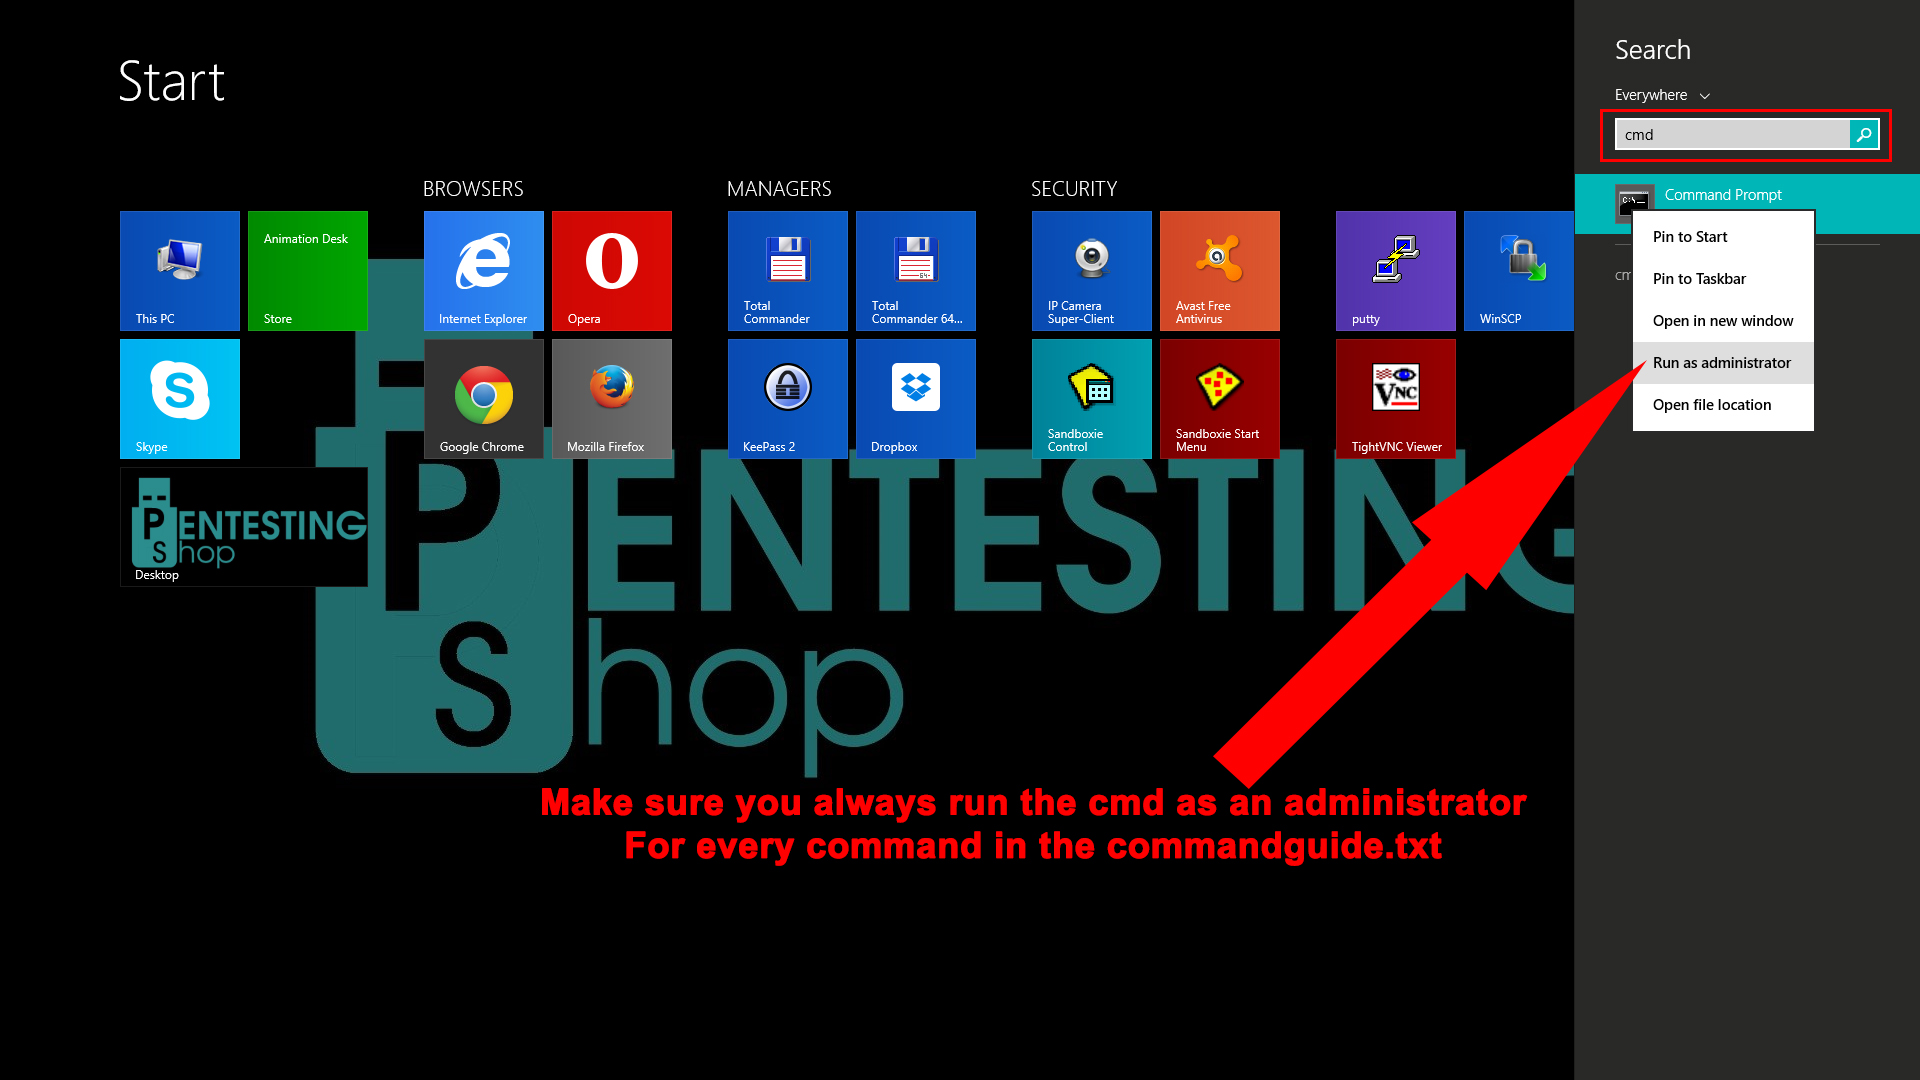
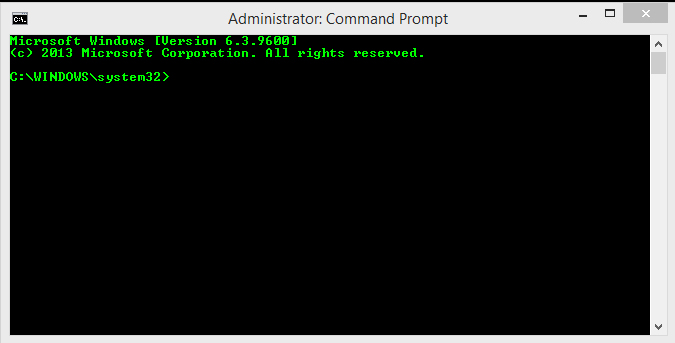
So now leave the text file open and click on START and type cmd and then right click on Command Prompt and choose Run as Administrator
like shown here
you should then get this
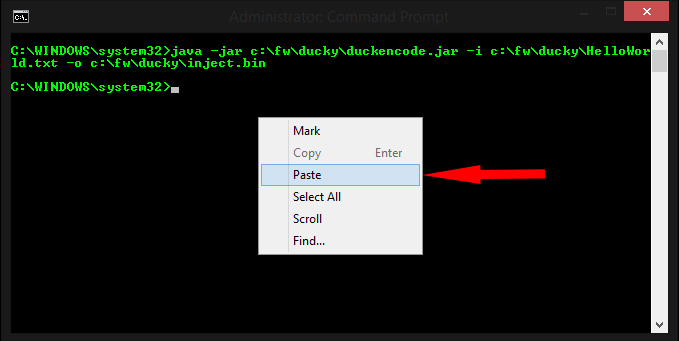
So now go back to the text file u downloaded from my LINK (commandguide.txt) and copy the first line like shown here
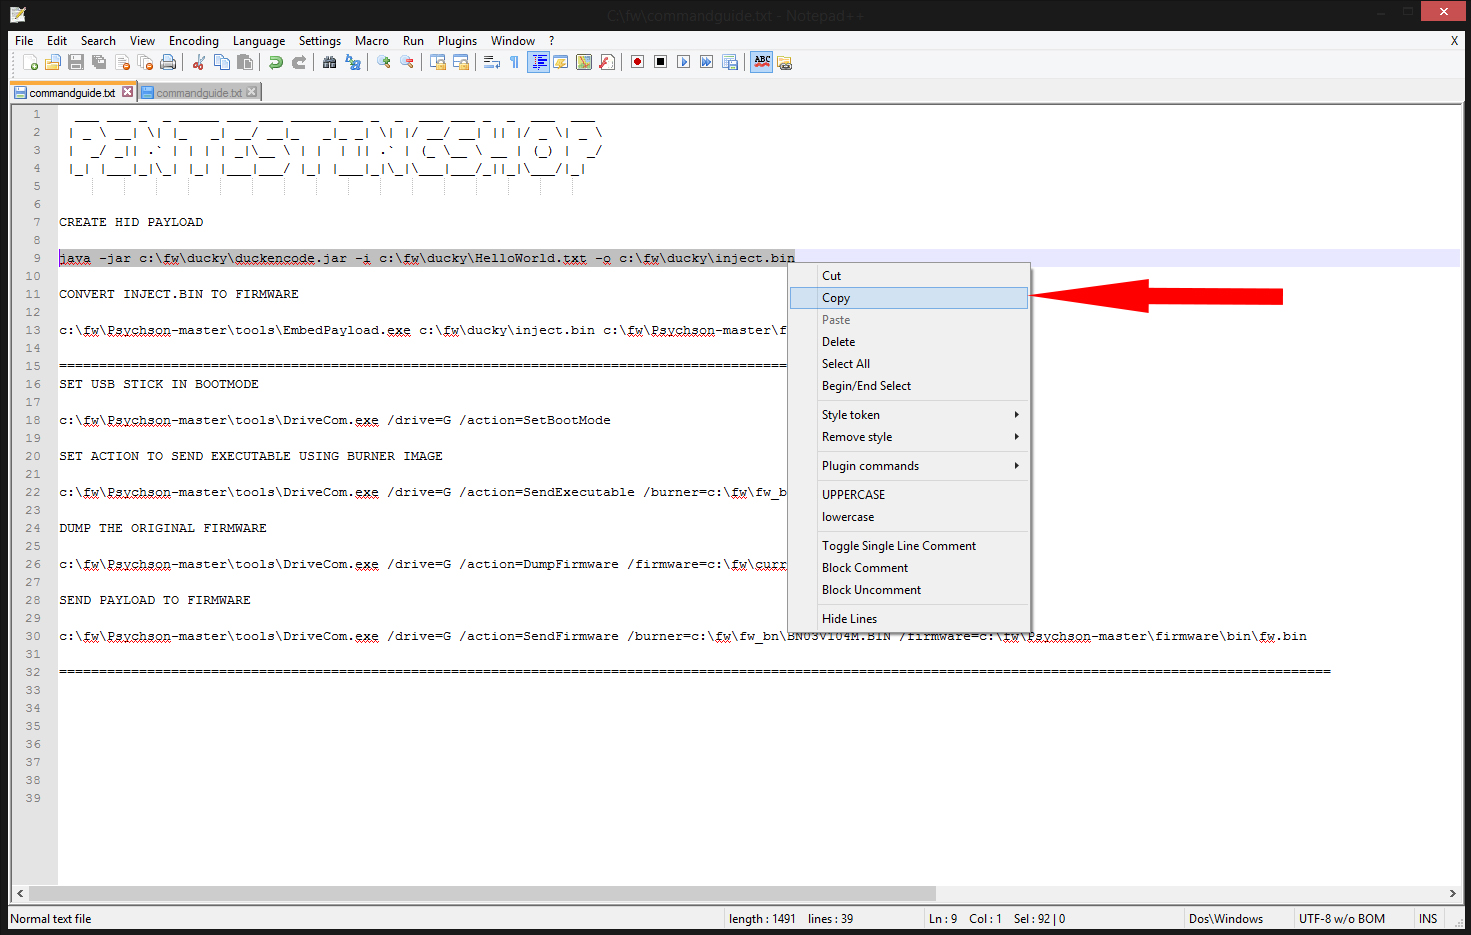
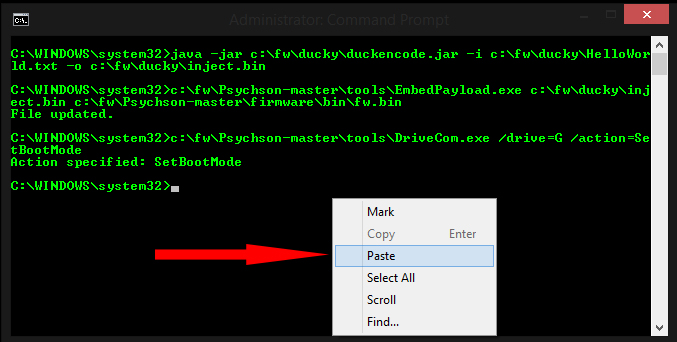
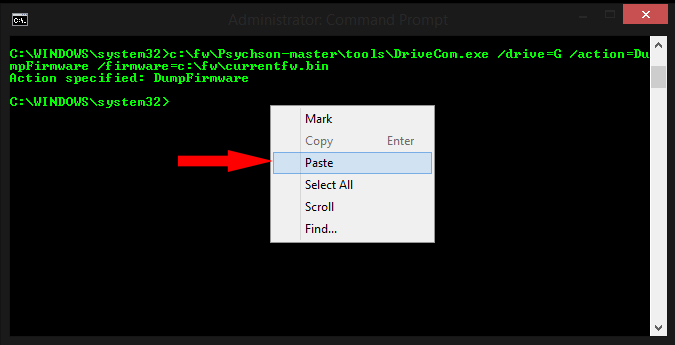
Now that u copied the first line go back to the command prompt and right click and choose paste like shown here
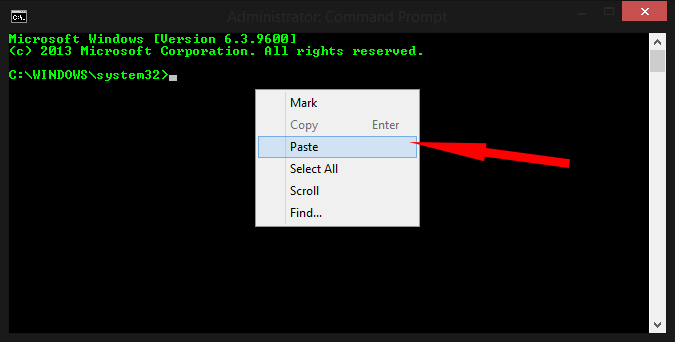
u should then get this
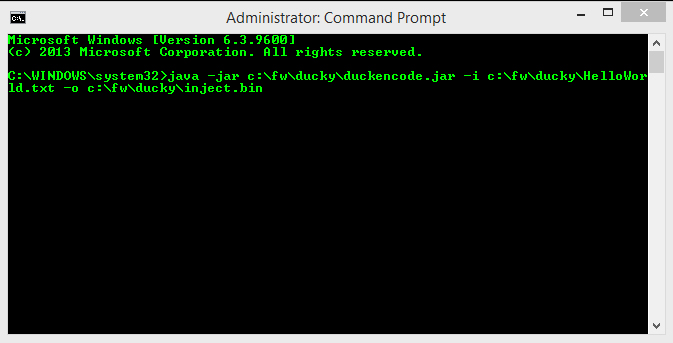
when u pasted this press ENTER
and you should then see this
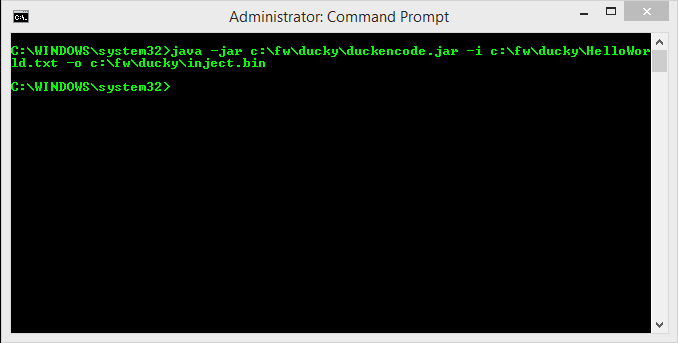
a new line and no errors if you see error on line 1 you should check the file HelloWorld.txt maybe it’s still empty
so now the command u just ran converted the HelloWorld.txt to a inject.bin using the duckencode.jar
Next we need to make a firmware file
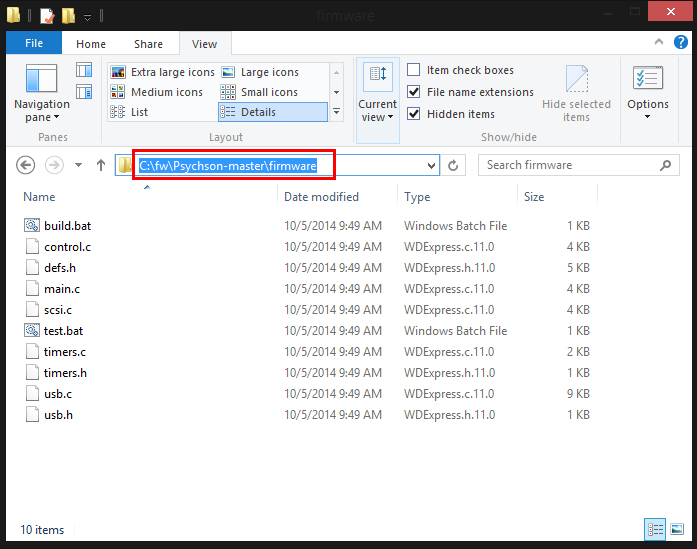
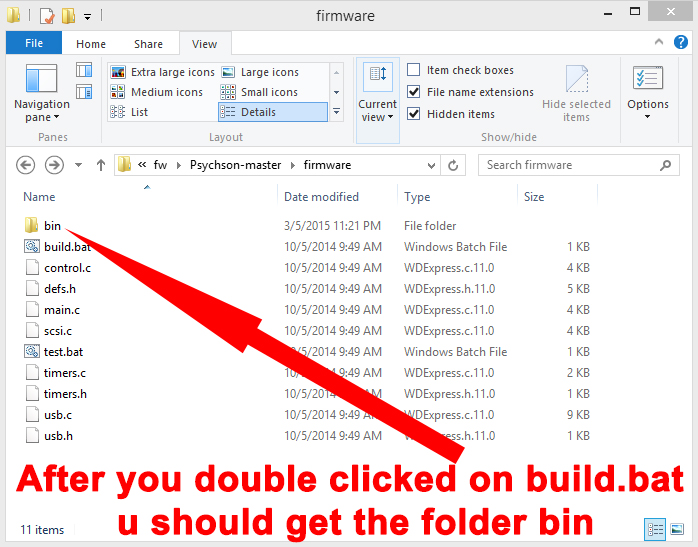
so go to C:\fw\Psychson-master\firmware
and you should see the files like shown here
So now that u are in this folder u should double click on build.bat
like shown here

u should see some thing happening in a command prompt and then it automatically closes, but afterwards you should now see a bin folder in this location
like shown here
So next step we go back to the text file u downloaded from my website and we are going to copy the second line
like shown here
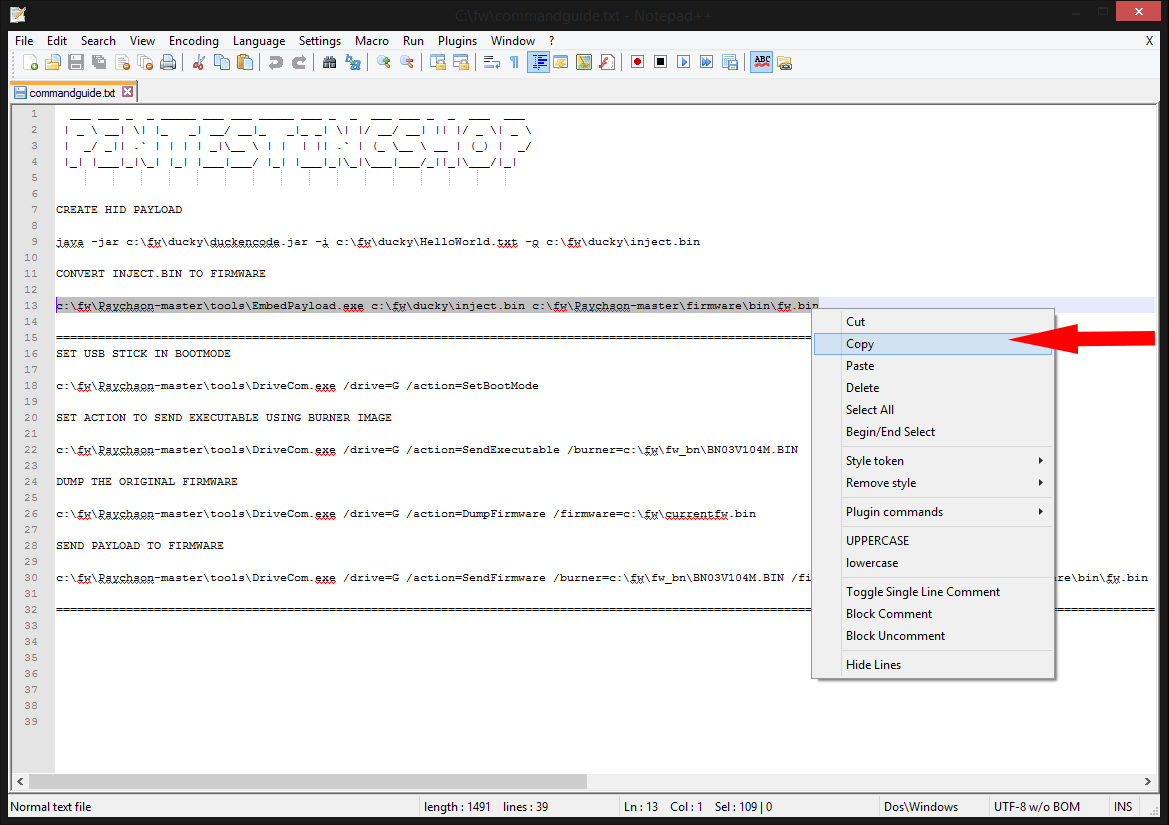
Now that u copied this
go back to the command prompt and paste it there (if you closed the cmd, be sure u run it again as Administrator)
like shown here
u should then get this
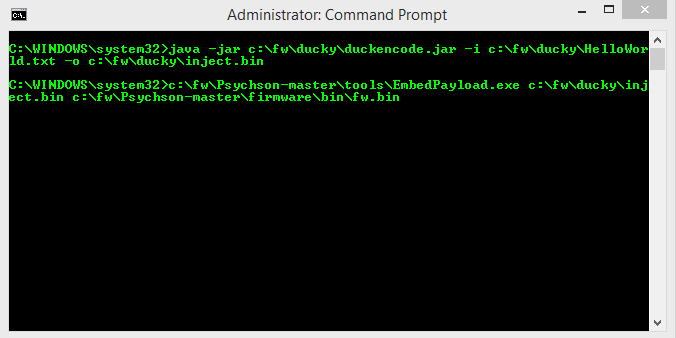
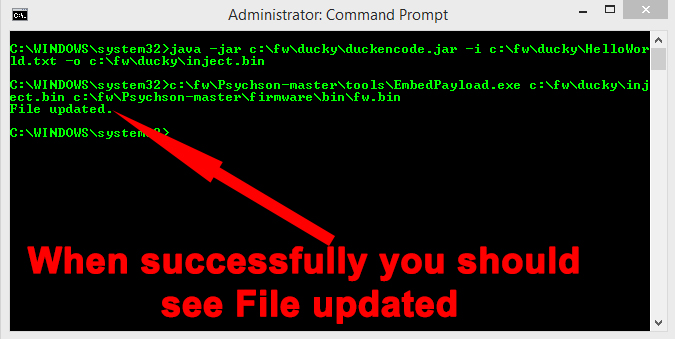
Now that u pasted the second line in the Command Prompt u should press ENTER
and when successfully you should see it print out File updated
like shown here
Now that this is done re-insert you USB stick
Now that the stick is your USB port open My computer and check what drive letter the USB Stick has.
like shown here
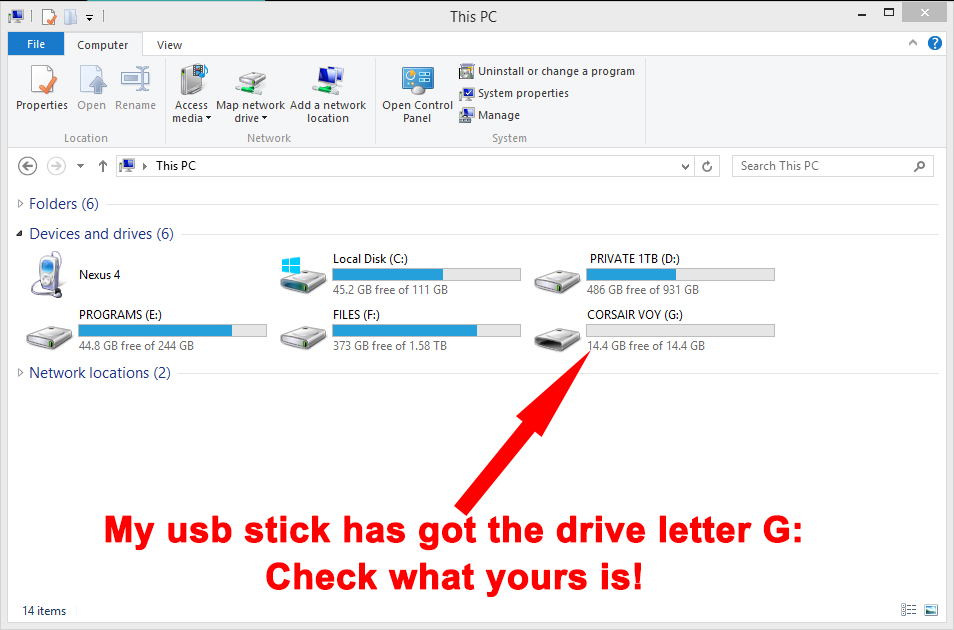
So make sure u remember the drive letter that has been assigned to your USB Stick!
So now go back to the text file u got from my website and copy the line under SET USB STICK IN BOOTMODE
like shown here
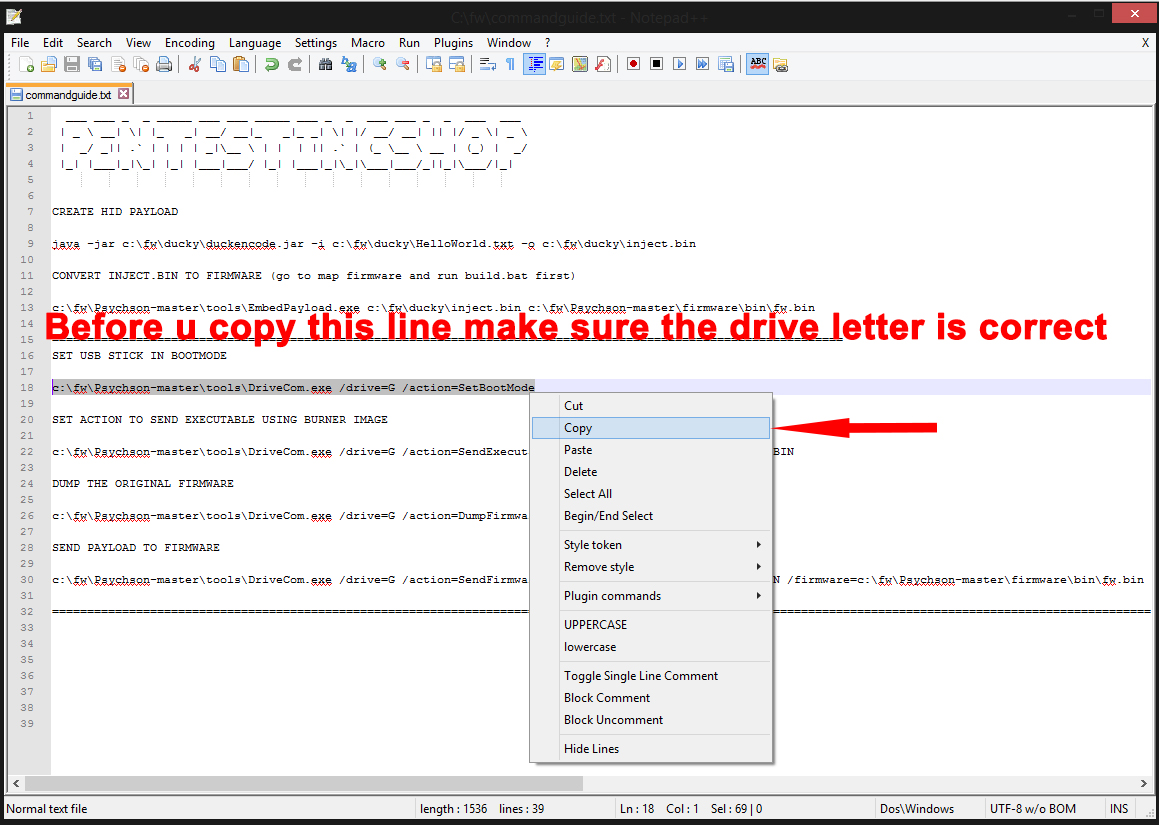
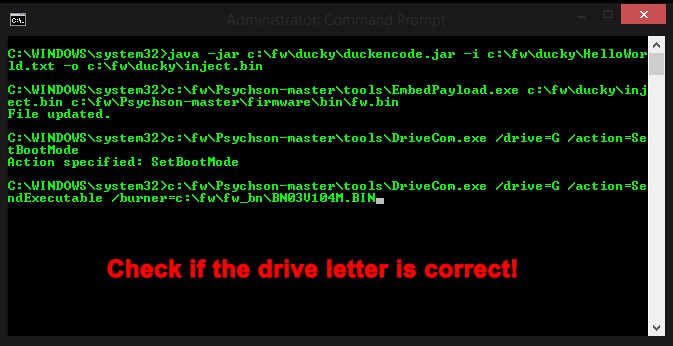
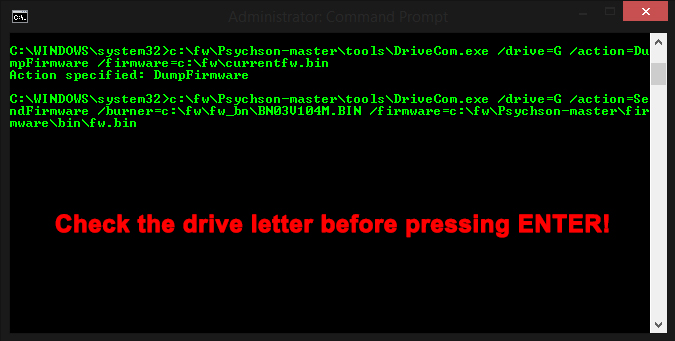
Like seen in the picture make sure that u change the drive letter to yours!
so where /drive=G is change the G to the drive letter that has been assigned to your USB Stick!
Now that u copied this line switch back to the Command Prompt and paste it there
like shown here
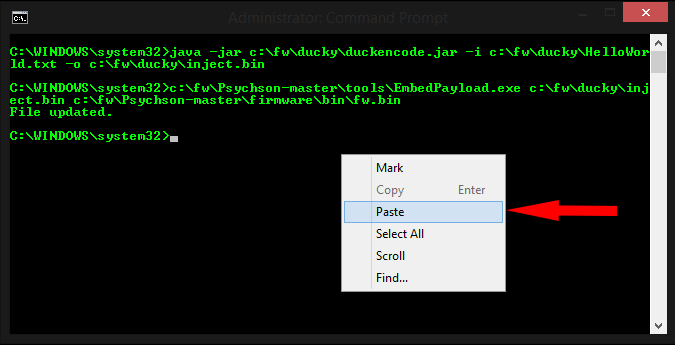
when u clicked paste u should get this
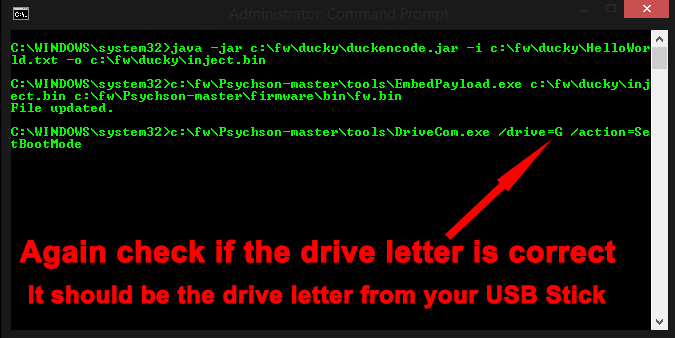
When u did this u can press ENTER
and u should then get this
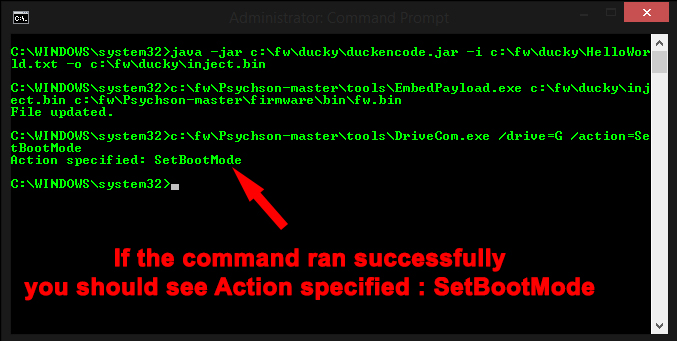
Also if you removed the casing around the USB Stick u bought from my webshop u should see that the blue led stays on
So now that the USB Stick is in BootMode
Go back to the text file and copy the line under SET ACTION TO SEND EXECUTABLE USING BURNER IMAGE
like shown here
So now that u copied this line switch back to the Command Prompt and paste it there
like shown here
again when u clicked paste
u should get this
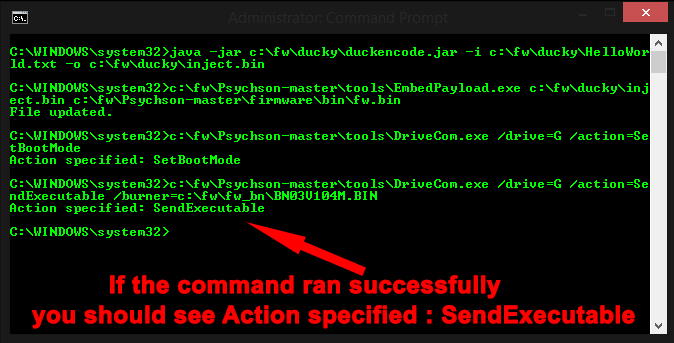
Now that the line is pasted u can press ENTER
and you should then see this
Now that this is done switch back to the text file
and copy the line under DUMP THE ORIGINAL FIRMWARE
like shown here
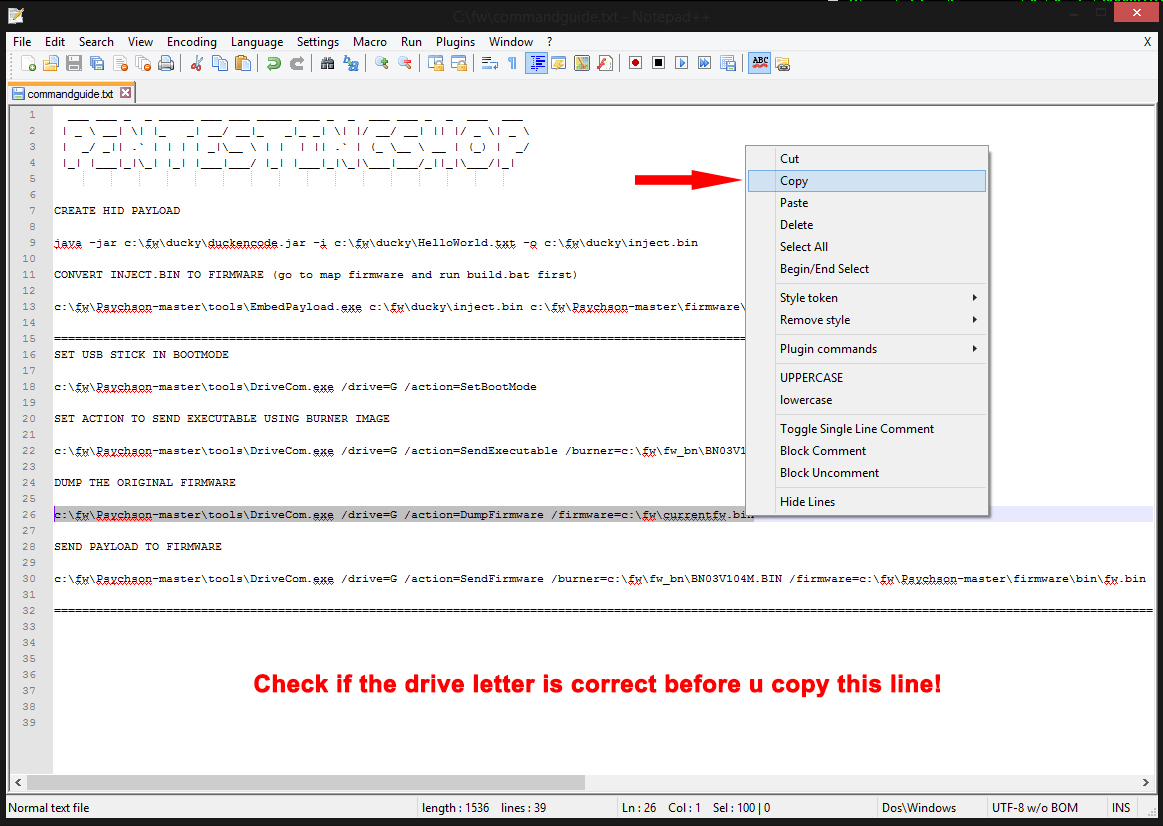
Now that u copied this line switch back to the Command Prompt and paste it there
like shown here
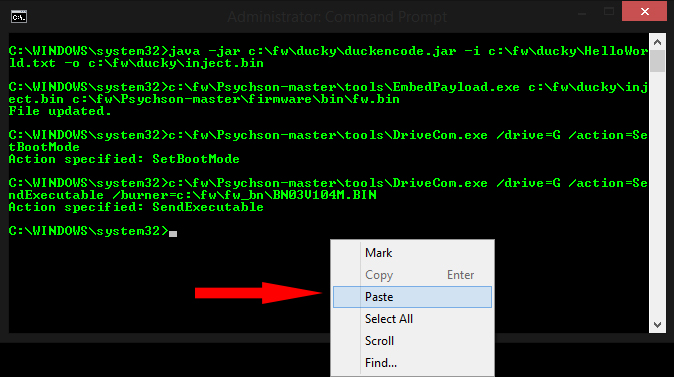
Now when u clicked paste you should see this
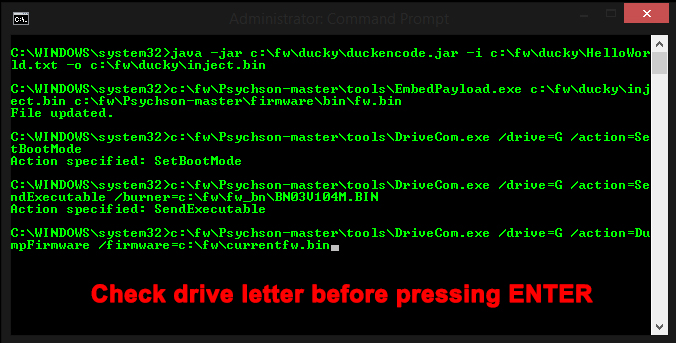
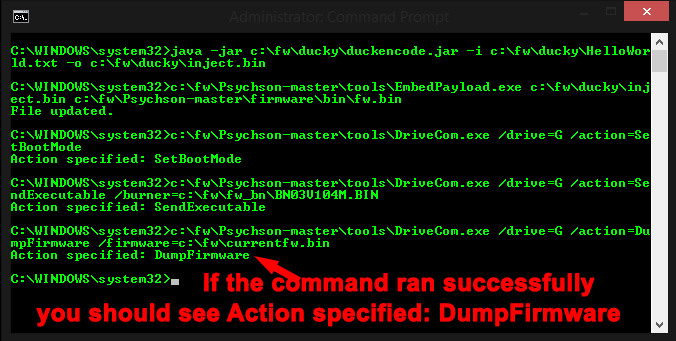
Now when u pasted it you can press ENTER
and should see this
Now that this is done switch one more time back to the text file and copy the line
under SEND PAYLOAD TO FIRMWARE
like shown here
now that u copied this line switch back to the Command Prompt and paste it there
like shown here
Now when u clicked paste you should get this
Now that it’s pasted u can press ENTER
and you should see this

You now just flashed your own USB Rubber Ducky using a regular USB Stick 🙂